
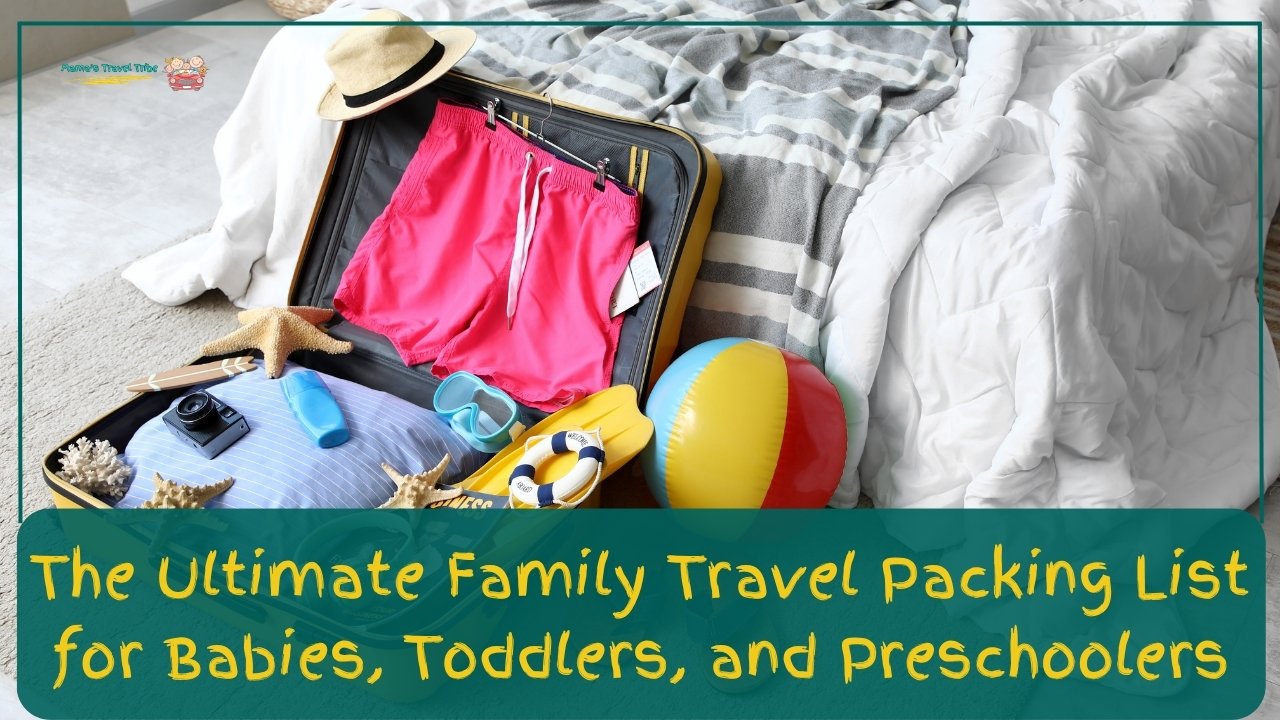
A strong family travel packing list is not really about bringing more stuff. It is about putting the right things in the right places so the travel day, the first night, meals, naps, and all the little transitions in between go more smoothly.
That matters a lot with babies, toddlers, and preschoolers because the cost of packing something badly is often higher than the cost of forgetting something small for yourself. A spare outfit buried in the wrong bag, a comfort item packed too deep, or wipes that are technically packed but not reachable can change the whole day fast.
This guide is built to help with that. It covers how to pack for babies, toddlers, and preschoolers across flights, road trips, day trips, overnight stays, outdoor trips, and longer vacations. The goal is not to hand you one giant list and hope it works. The goal is to give you a packing system you can actually follow.
Why packing for kids feels harder than packing for adults
A good family travel packing list is not just longer than an adult packing list. It has to do more jobs. When I pack for myself, I am mostly thinking about clothes, toiletries, and whatever I need for the trip itself. When I pack for kids, I am packing for sleep, meals, diaper changes, messes, delays, comfort, boredom, and the small problems that can ruin a travel day if I do not have the right thing within reach.
That is why packing with young kids feels heavier, even before the bags are full. The issue usually is not volume alone. It is consequence. If I forget my own extra shirt, I can deal with it. If I forget wipes, pajamas, the comfort item, or the snack backup, the day gets harder fast. That is also why I keep coming back to simple systems instead of random packing. If you already feel like you are throwing things into bags without a clear plan, practical travel hacks for moms is a useful companion read because it helps with the real-life side of organizing family travel, not just the packing list itself.
A simple comparison makes the difference clearer:
| Packing for adults | Packing for kids |
| Mostly personal needs | Personal needs plus regulation, comfort, cleanup, and routines |
| Forgotten item is often annoying | Forgotten item can affect the whole day |
| Easier to buy replacements later | Replacement may be harder to find fast, or not useful in the moment |
| One bag can work fine | Access matters as much as the bag itself |
If this is your first time traveling with a baby and a toddler, check out my detailed guide here.
Children need support across sleep, feeding, hygiene, transport, and regulation
This is the part that changes everything. Kids do not just need more stuff. They need support in categories adults can usually improvise around. A baby may need bottles, bibs, diapers, a sleep sack, medicine, and a backup outfit before the trip has even really started. A toddler may need snacks, wipes, a comfort item, simple activities, and a clean shirt within the first two hours. A preschooler may need less hands-on care, but they still need structure, weather-appropriate clothes, and things that make transitions easier.
That is why a strong travel checklist for baby and toddler has to go beyond “pack clothes and toiletries.” It needs to cover the actual pressure points of the day.
The categories that usually matter most are:
- sleep support
- feeding and snacks
- hygiene and cleanup
- transport gear
- comfort and regulation
- health basics
This is also why packing and flight planning overlap so often. If part of your trip includes flying, the line between what is “packed” and what needs to stay close gets much more important. That is where what documents kids need to fly and later, how to make a bed on a plane become useful supporting reads, because once kids are traveling in transit-heavy ways, the packing list has to support the travel mode too.
Travel days create delays, spills, and more immediate needs
Packing for kids feels harder because travel multiplies the small things. A normal day at home has wipes in the same drawer, extra clothes in the same room, and a kitchen a few steps away. A travel day breaks all of that up. Now the snack has to be in the right pouch, the spare clothes have to be in the right bag, and the medicine has to be reachable without opening everything you packed.
That is why travel-day packing and destination packing are not the same thing. A lot of parents do fine packing the suitcase and still have a rough day because the immediate-access items were buried too deep.
The travel-day pressure points usually look like this:
| Travel-day problem | Packed item that solves it |
| spilled drink or diaper leak | quick-change clothes and cleanup supplies |
| delayed meal | easy snack backup |
| missed nap or overtired child | comfort item and simple sleep support |
| long wait in transit | small activity rotation |
| motion, mess, or sticky hands | wipes, tissues, disposal bags |
This is one reason I never think of a baby travel packing list or toddler travel packing list as just a suitcase exercise. The real challenge is not bringing more. It is knowing what needs to be close, what can stay packed away, and what will matter most when the day goes sideways.
The cost of forgetting one item is often higher with kids
This is the part that makes family packing feel so much less forgiving. Adults can usually improvise. Kids often cannot, or at least not without the trip getting harder for everyone around them. If I forget my charger, that is annoying. If I forget the child’s medicine, sleep item, wipes, or backup clothes, it changes how the next few hours go.
That is why I always think about kid packing in terms of consequences, not just categories. Some items are easy to replace later. Some only matter if the weather changes. Some are the kind of thing you notice once and then never forget again because the whole day became harder without them.
A good way to sort it is this:
| If you forget it | What usually happens |
| extra outfit | you may have one messy stretch but still recover |
| wipes | diapering, meals, cleanup, and sticky hands all get harder fast |
| medicine basics | small problems turn stressful quickly |
| comfort item | naps, transitions, and bedtime may all feel rougher |
| snack backup | delays and waiting time get harder than they need to be |
This is also why I do not like packing all the family essentials into one big main bag and calling it done. The farther the important items are from the moment you need them, the more likely the day is to unravel. If your trip includes long waits in transit, road time, or a flight, this is where support posts like plane activities for a 1-year-old and best road trip activities for kids start making sense inside a packing guide. They are not just activity posts. They help you decide what actually belongs in the bag that stays close.
Why packing by category works better than packing by room
Packing by room sounds organized until you are actually on the trip. Clothes from the bedroom, medicine from the bathroom, feeding items from the kitchen, toys from the playroom. That works fine while you are still in the house. It works much less well once you are standing in an airport bathroom, pulling over at a rest stop, or trying to get everyone settled in a hotel after a long day.
Packing by category works better because it matches the way travel problems show up. Kids do not need “whatever came from the kitchen.” They need feeding items. They do not need “whatever was in the bathroom.” They need diapering, cleanup, and health items. Once I started thinking in those categories, packing got simpler and travel days got a lot easier to manage.
A category-based family vacation packing list with kids usually looks more like this:
| Category | What belongs there |
| Clothing | outfits, layers, pajamas, socks, weather pieces |
| Diapering and cleanup | diapers, wipes, changing mat, disposal bags, extra cloths |
| Feeding | bottles, bibs, utensils, cups, snacks, meal backup items |
| Sleep | sleep sack, pajamas, white noise, comfort items |
| Health | daily medicine, fever basics, thermometer, bandages |
| Travel-day support | activity kit, quick snacks, wipes, emergency outfit |
This is also what makes the next section work. Once you pack by function, it becomes much easier to split the family’s things into checked luggage, carry-ons, diaper bags, and the items that need to stay within arm’s reach.
How to build a family travel packing system
The easiest packing list to follow is the one that tells you where things belong, not just what to bring. That matters a lot with young kids because the same trip usually needs three different layers of packing at once: the items you need when you get there, the items you need during transit, and the items you may need in the next ten minutes if the day starts slipping.
This is why I do not build a family travel packing list by suitcase first. I build it by function. Once the categories are clear, the bags usually become much easier to fill.
A simple packing system starts like this:
| Packing layer | What it is for |
| Main luggage | The bulk of the trip: clothes, sleep gear, extras, overflow supplies |
| Carry-on or travel bag | The full travel day: delays, meals, medicine, spare clothes, activities |
| Within-reach items | The next one to two hours: wipes, snacks, cups, comfort item, one emergency outfit |
The logic here lines up with official travel guidance too. CDC recommends packing a travel health kit with items you may need during the trip, including medicines that may be hard to replace, and keeping medicines in your carry-on in case luggage is delayed. TSA also says formula, breast milk, toddler drinks, and baby food are allowed in reasonable quantities in carry-on bags and should be declared at screening. Those are practical reminders that the bag layout matters as much as the checklist
Packing by function instead of random items
When parents say packing feels chaotic, this is usually why. The list is built around random objects instead of what those objects are meant to solve. A bottle in one bag, bibs in another, wipes in three different places, pajamas packed with daytime clothes, medicine buried in the suitcase. The trip starts with all the right items and still feels disorganized because nothing is grouped by use.
Packing by function fixes that. It asks a better question: what problem is this item here to solve?
A function-based travel checklist for baby and toddler usually breaks down into a few core groups:
| Function | What usually goes in it |
| Sleep | pajamas, sleep sack, comfort item, white noise, bedtime basics |
| Feeding | bottles, formula or pumping supplies, bibs, utensils, cups, snack containers |
| Health | regular medicine, fever basics, thermometer, bandages, insurance details |
| Cleanup | wipes, disposal bags, extra cloths, diaper cream, stain or mess backup |
| Clothing | daily outfits, layers, socks, weather gear, emergency change |
| Travel-day support | snacks, one activity kit, charger, documents, parent essentials |
This is one reason practical travel hacks for moms fits naturally into this page. The useful part of “travel hacks” is not clever tricks. It is building systems that make the day easier when a child needs something quickly.
Separating checked luggage, carry-on, and within-reach items
This is where the system starts doing real work. A lot of family packing problems are not about forgetting something. They are about putting the right item in the wrong place. The pajamas are packed, but they are in the checked suitcase when the toddler spills milk in transit. The medicine is packed, but it is under three packing cubes in the overhead bag. The wipes are packed, but the diaper bag is closed up under the seat while the child is already sticky and crying.
I separate family packing into three zones:
| Zone | What belongs there |
| Checked luggage or main suitcase | Bulk clothes, overflow diapers, extra shoes, most destination items |
| Carry-on | Full-day travel support, medicine, extra clothes, snacks, activities, documents |
| Personal item or seat-access zone | The next diaper, next snack, wipes, cup, one comfort item, one emergency outfit |
This is especially important on flight days. TSA’s family travel guidance makes it clear that baby formula, breast milk, toddler drinks, and baby food can go in carry-ons in reasonable quantities, which only helps if they are packed where you can actually pull them out at security and use them later. On longer travel days, this same logic applies to medicine too. CDC advises travelers to keep medications in carry-on baggage and bring enough for the trip plus extra in case of delays.
For families who are still building this habit, I usually tell them to picture the first part of the trip in order:
- what do I need if we get delayed before boarding
- what do I need in the first hour of the drive
- what do I need if someone spills, leaks, or melts down before we arrive
That is usually enough to sort what belongs close and what can stay packed away.
One bag for sleep, one for feeding, one for health, one for cleanup
This is the part of the system that makes real-life travel feel less chaotic. Instead of letting every bag become a mix of unrelated items, I like packing in small working groups. Sleep items together. Feeding items together. Health items together. Cleanup items together. That way, when a problem shows up, I am reaching for one small kit instead of opening the whole suitcase.
It also makes repacking easier once the trip starts. If a child gets sick, I restock the health pouch. If bedtime was rough, I know exactly where the sleep items are. If lunch was messy, the cleanup bag is already doing the job it was packed for.
A simple way to organize it:
| Bag or pouch | What goes in it | When it matters most |
| Sleep bag | pajamas, sleep sack, comfort item, white noise, bedtime basics | arrival night, naps, rough evenings |
| Feeding bag | bottles, formula supplies, bibs, utensils, cups, snack containers | travel day, meals away from the room, delays |
| Health bag | daily medicine, fever basics, thermometer, bandages, insurance card copies | late-night issues, long travel days, emergencies |
| Cleanup bag | wipes, disposal bags, extra cloths, stain or mess support, diaper cream | spills, diapering, sticky hands, blowouts |
CDC’s packing guidance lines up with this more than people realize. It recommends bringing a travel health kit with the medicines and supplies you may need during the trip, and it specifically points out that some items may be hard to replace while traveling. That is exactly why I do not want health items scattered across the luggage.
This same logic helps with trip-type packing too. On a flight, the feeding and cleanup kits may need to stay closer. On a road trip, the snack and mess bags might live in the front or seat-back zone. On an outdoor trip, the cleanup and layering pieces often need to work harder. That is part of why support posts like how to hike with a toddler, and camping activities for toddlers belong in this category cluster. They help parents think through what kind of kit needs to stay more active based on how the family is traveling.
Why the packing system matters more than the exact bag
Parents spend a lot of time worrying about the “right” travel bag, and honestly, I think the system matters much more. A beautifully designed bag does not help much if pajamas are packed with day clothes, the medicine is lost in the bottom, and the emergency outfit is in the wrong compartment. A plain tote with a good system usually works better than a perfect bag with no logic behind it.
What matters most is:
- can you find things quickly
- can you restock the categories easily
- can another adult understand the system if they need to help
- can you tell at a glance what is missing before you leave
A simple packing system beats the exact bag every time because it travels better between trip types. You can use the same sleep bag on a weekend hotel stay, a flight, a road trip, or a week at grandma’s house. You can move the same cleanup pouch between the stroller, the diaper bag, and the carry-on. That flexibility is what makes the whole system stick.
A quick comparison:
| What parents often focus on | What usually matters more in practice |
| the brand or style of the bag | whether the categories are grouped clearly |
| how many pockets it has | whether the right items stay within reach |
| whether it looks like a travel bag | whether it works under stress |
| finding one perfect all-in-one bag | building a system that works across bags |
This is also where the broader family packing system connects back to the travel day itself. If the child’s immediate needs are already grouped and accessible, the rest of the article starts getting much easier to follow. You are not just making a list. You are building a structure that can handle delays, spills, missed naps, long waits, and late arrivals without forcing you to unpack the entire trip to solve one small problem.
What changes by child age when you pack
Age changes the list more than trip length does. A weekend away with a newborn can need more support gear than a full week with a preschooler. That is why I never think of a family travel packing list as one fixed checklist for all kids under five. The clothes might look similar on paper, but the real packing differences usually come from feeding stage, mobility, sleep setup, diapering, and how much the child needs help regulating on the move.
This is also where a lot of overpacking starts. Parents try to solve every age at once instead of packing for the child they actually have right now. A crawling baby and a potty-training toddler do not need the same travel-day support. A preschooler may need fewer care items but more weather flexibility, more activity structure, and different food backups.
A simple age view helps:
| Child stage | What usually drives the packing list |
| Newborn | feeding, diapering, clothing changes, sleep support |
| Infant | bottles or solids, sleep items, floor-time and cleanup support |
| One-year-old | snacks, movement support, spare clothes, simple activities |
| Toddler | snacks, cleanup, comfort item, activity rotation, potty needs |
| Preschooler | clothing, activity structure, meal support, fewer baby-care items |
Newborn packing changes the whole system
Newborn packing is usually the least flexible because the day revolves around care. That does not always mean the biggest suitcase, but it does mean the highest demand for things to be easy to reach. Feeding, diapering, spit-up, blowouts, temperature shifts, and sleep support all matter more because there is so little margin if something is missing.
A newborn baby travel packing list usually leans hard into:
- more clothing backups than you think you need
- a complete feeding setup, whether that means breastfeeding support, bottles, or both
- diapering and cleanup supplies in more than one place
- one simple sleep setup that stays familiar from home to travel
This is one reason I separate packing by function instead of by room. Newborn trips are much easier when the diapering, feeding, and sleep categories are already grouped before anything goes into the bag.
A quick newborn view:
| Newborn category | Usually needs more attention because… |
| Clothing | leaks and spit-up can go through multiple outfits quickly |
| Feeding | the timing is frequent and hard to improvise around |
| Cleanup | small messes happen often and need quick access supplies |
| Sleep | even simple sleep disruptions can affect the whole day |
Infant packing changes again once feeding and mobility shift
Infant packing often gets more complicated before it gets simpler. Once babies move past the newborn stage, the list starts changing around solids, movement, and more active wake time. A younger infant may still be fairly portable. An older infant may want floor time, grab everything in reach, nap less predictably, and need more active support through the day.
This is where packing list for traveling with a baby starts changing by month, not just by category. The basics stay familiar, but the volume shifts:
- fewer newborn-style clothing emergencies for some babies
- more feeding gear if solids are part of the day
- more cleanup because mealtimes and floor time get messier
- more interest in simple objects, books, and sensory play during travel
One-year-old travel needs
Packing for a one-year-old is where a lot of parents get surprised. On paper, it can look like you should be packing less because the newborn stage is over. In real life, this age often needs a very active travel setup. A one-year-old usually wants movement, snacks, short bursts of activity, and quick resets when things go sideways. That changes the packing list in a big way.
This is where I stop thinking mostly in terms of baby care and start thinking in terms of travel-day management. The one-year-old list usually needs:
- fewer tiny baby-care items than before
- more snack structure
- more backup clothes for food, spills, and play mess
- more movement-friendly travel support
- simple activities that work in short rounds
A one-year-old toddler travel packing list often overlaps both categories. They may still use bottles or cups, still need diapers, still depend on comfort items and naps, but they are also much more likely to get restless, throw things, and lose patience in lines, car seats, or long meals.
A quick look at what usually changes:
| One-year-old need | Why it changes the packing list |
| more movement | you need better within-reach items, not just a full suitcase |
| more snacks | food becomes part of pacing, not just feeding |
| messier meals | cleanup and spare clothes matter more |
| less willingness to stay still | activity planning becomes part of packing |
Toddler travel needs
Toddler packing is less about bulk and more about the right mix of structure, food, cleanup, and comfort. Toddlers do not usually need the same amount of feeding gear as babies, but they often need more help with transitions, boredom, accidents, and the kind of little disruptions that pile up over a travel day.
This is where a strong packing list for traveling with a toddler usually leans on:
- snack rotation
- easy-to-reach wipes and cleanup items
- a comfort item that actually works
- a backup outfit that stays close
- activities that can be used one at a time
- potty-training support if relevant
For a lot of families, this is also the age where the travel-day bag matters more than the main suitcase. Toddlers can make a day hard long before the suitcase gets opened, so the items that stay within reach usually do more work than the things packed for the destination.
A useful toddler view:
| Toddler category | Why it matters |
| snacks | helps with timing, mood, waiting, and transitions |
| cleanup | meals, messes, and accidents happen fast |
| comfort | naps, delays, and travel stress hit harder without something familiar |
| simple activities | boredom builds quickly in transit |
| spare clothes | still essential for spills, potty misses, and rough travel days |
Preschool travel needs
Preschoolers usually need less hands-on care and more flexible support. The packing list may get lighter in some ways because diapers, bottles, and some sleep items may be gone. At the same time, it can get a little broader because preschoolers often need more weather flexibility, more active clothing, more food volume, and more things to do during long stretches of waiting or transit.
This is where the list often shifts from care-based support to routine-based support. A preschooler may not need constant physical help, but they still need:
- the right clothes for the trip type
- meals and snacks that fit the day
- simple activities for downtime
- one or two comfort anchors for sleep or long travel
- weather layers and shoes that actually work
Preschool packing is also where the trip type starts changing the list more sharply. A preschooler’s city-trip packing list and outdoor-trip packing list may look much more different than a baby’s, because the child can do more but also needs more appropriate gear for the setting.
If you need trip ideas and activities by age, visit this page!
Why mobility and feeding stage change the list
This is really the thread that ties all the ages together. The biggest packing changes usually come from two things:
- how the child eats
- how the child moves
A child who still needs bottles, pumped milk, formula, or baby food is going to need a very different feeding setup from a child who mostly eats snacks and simple meals. A child who is happy in a stroller is going to change your day differently from a child who wants to walk, climb, and stop every ten steps.
That is why I find it more useful to think in stages than exact ages:
| What changes | How it affects the list |
| feeding stage | changes bottles, utensils, bibs, snacks, and cleanup needs |
| mobility stage | changes stroller use, carrier use, spare clothes, activity planning, and gear access |
| sleep stage | changes what matters for naps, bedtime, and comfort items |
| diaper or potty stage | changes cleanup, spare clothing, and bathroom support |
Once you know where your child is in those categories, the rest of the packing guide starts to make more sense.
How packing changes by trip type
A packing list that works for a flight will not always work for a road trip, and a beach weekend needs a different kind of thinking than a city stay or an outdoor trip. The base categories stay the same. Kids still need clothing, feeding support, sleep help, cleanup, health basics, and travel-day items. What changes is where the pressure shows up.
That is why I do not use one flat family vacation packing list with kids for every trip. I use the same system, then adjust the weight of each category based on how we are traveling and what the day is likely to look like.
A quick trip-type view:
| Trip type | What usually needs more attention |
| Flight | carry-on access, delays, documents, immediate-use items |
| Road trip | car organization, snack pacing, mess control, easy overnight access |
| Beach trip | extra clothes, sun gear, wet-bag strategy, cleanup |
| City trip | walkable gear, layering, compact packing, meal support |
| Outdoor trip | weather layers, cleanup, comfort gear, flexible shoes |
| Day trip | compact essentials, food, cleanup, one backup outfit |
| Overnight trip | sleep setup, bedtime items, next-morning access |
| Longer vacation | laundry plan, overflow supplies, restocking strategy |
CDC’s travel packing guidance lines up with this more than most families realize. It recommends packing by the needs of the trip, bringing a travel health kit, and planning around what may be hard to replace on the road. That is exactly what trip-type packing is doing in practice.
Flights need more immediate-access packing than most trips
Flights usually push more items into the carry-on and the personal-item zone. That is because so much of the day happens before you ever reach the destination. Check-in, security, gate delays, boarding, takeoff, in-seat snacks, diaper changes, missed naps, spilled drinks, and landing all happen before the suitcase gets opened.
That is why flight packing is usually less about “what should I bring?” and more about “what needs to stay reachable the whole time?” TSA’s family travel guidance is a good reminder here because it points out that formula, breast milk, toddler drinks, and baby food are allowed in reasonable quantities in carry-on bags and should be declared at screening. Those items only help if they are packed in a way that makes them easy to pull out.
For flights, I usually give extra space to:
- feeding and snack support
- one full backup outfit per child
- medicine and health basics
- wipes and cleanup
- comfort items and sleep support
- documents and chargers
This is also where the flight-related posts naturally fit into the packing system. If the question is mostly about air-travel paperwork, what documents do kids need to fly belongs in the planning stage. If the question is more about seat setup and sleep, how to make a bed on a plane helps narrow down what is actually worth packing for the flight itself.
Flights can be stressful. Read our detailed guide on what you need to know when flying with kids before you book your flight.
Road trips need easier car access, not just more supplies

Road trips tempt parents to throw everything into the car because space can feel less strict than a flight. The problem is that “somewhere in the car” is not a system. A road trip with kids works better when the things you need while driving are separated from the things you only need after arrival.
For a road trip packing list for kids, I usually think in layers:
- what stays up front or within arm’s reach
- what stays with the child in the back-seat zone
- what stays packed until the overnight stop
That usually means extra attention on:
- snack boxes
- wipes and cleanup items
- seat-back or within-reach activities
- motion- and mess-management supplies
- an overnight bag that saves you from unpacking the whole trunk
A practical road-trip layout:
| Zone | What belongs there |
| Front-seat or parent-access zone | wipes, tissues, medicine basics, emergency snacks |
| Kid-access zone | cups, snack rotation, one or two activities, comfort item |
| Overnight-access bag | pajamas, toothbrushes, one next-day outfit, diapering basics |
Beach trips need a stronger wet-and-dirty system
Beach packing usually looks easy on paper and messy in real life. The issue is not just swimsuits and towels. It is the constant turnover between wet clothes, sandy feet, sunscreen, snacks, cleanup, and the child who needs a full reset long before the adults are done. That is why beach packing usually needs a stronger clothing-and-cleanup system than people expect.
For a beach trip, I pack more heavily into:
- spare clothes
- swim layers and sun layers
- wet-bag or dirty-clothes strategy
- wipes and rinse-off support
- sandals or easy-change shoes
- snack and water access
A beach-trip reality check:
| Beach problem | Packed item that usually solves it |
| wet clothes piling up | separate wet bag or packing cube |
| sand everywhere | wipes, rinse cloths, easy-change clothes |
| sun exposure | hats, layers, sunscreen, shade support if needed |
| late-day hunger and crankiness | snack and water plan that stays outside the main suitcase |
Beach trips are also one of the clearest examples of why overpacking and good packing are not the same thing. The right extra clothes matter. Five extra outfits that stay buried at the bottom of the bag usually do not.
City trips usually reward compact, flexible packing
City trips change the packing list because you are often moving more on foot, carrying less at one time, and working around restaurants, public spaces, nap timing, and weather shifts. This is where bulk starts working against you. A large stroller, too many shoes, too many backup toys, or a bag system that only works in a car can make a city day harder than it needs to be.
What usually matters more on city trips:
- good layering
- compact cleanup supplies
- easy snacks and water access
- shoes that work for real walking
- lighter transport gear
- one day bag that can handle the outing without feeling overloaded
A compact city setup often looks like this:
| Better city-trip item | Why it works better |
| light layers | easier to adjust through the day |
| compact stroller or carrier setup | easier for walking and transitions |
| small snack kit | easier than carrying a full food bag all day |
| one streamlined day bag | keeps outings manageable |
Outdoor trips need more weather protection and cleanup planning
Outdoor trips change the list because the day usually gets messier, the weather matters more, and getting back to a clean indoor setup is not always easy. For young kids, that means I pack less for convenience and more for recovery. Layers, backup clothes, easy cleanup, and shoes that can handle dirt or damp ground all start doing more work than “nice” outfits or extra toys.
What usually matters most on an outdoor trip:
- layers that can be added or removed fast
- backup clothes that are easy to change
- sun and weather protection
- cleanup supplies that can handle dirt, mud, and sticky hands
- snacks that travel well outside
A simple outdoor packing view:
| Outdoor issue | What usually belongs in the bag |
| weather changes | light layers, rain layer, extra socks |
| dirt and wet clothes | backup outfit, cleanup cloths, separate dirty-clothes bag |
| long stretches outside | sturdy snacks, water, hat, sunscreen if relevant |
| tired kids late in the day | comfort item, easy-change clothes, one calming reset item |
Outdoor packing also tends to reward less bulk and better choices. One useful layer usually matters more than three “just in case” pieces that never come out of the bag.
Day trips need a tighter, more disciplined packing list
Day trips are where a lot of parents overpack because there is no suitcase to hide the extras in. The better approach is to be stricter. A day trip bag should solve the most likely problems without turning into a full vacation bag you have to carry all day.
For a day trip, I usually want:
- one backup outfit
- wipes and cleanup basics
- snacks and water
- diapers or potty support if needed
- one comfort item
- one or two simple activities, not a full toy bag
- medicine only if it is likely to matter during the outing
A day-trip filter helps:
| Pack it for a day trip if… | Leave it behind if… |
| you would truly need it in the next few hours | it only matters if the trip becomes an overnight |
| it solves a common child problem fast | it is bulky and unlikely to get used |
| it helps with food, cleanup, comfort, or weather | it is extra “just in case” gear with no clear job |
This is where a lot of families discover that smaller packing can actually feel better. A tight bag with the right categories usually works better than a large bag full of extras.
Overnight trips need first-night access more than extra volume
Overnight trips create a very specific packing mistake: families bring the right things, but the first-night items are packed too deep. After a long travel day, nobody wants to open every bag to find pajamas, toothbrushes, diapers, medicine, and the comfort item.
That is why I like thinking about overnight travel in two layers:
- what the family needs for the first night and first morning
- what can stay packed until later
A useful overnight setup:
| First-night item | Why it should stay easy to reach |
| pajamas | bedtime goes smoother when they are not buried |
| diapers or potty items | often needed right after arrival |
| toothbrushes and wash-up basics | part of the quickest reset after travel |
| comfort item and sleep support | makes bedtime less chaotic |
| one next-day outfit | saves digging through the main bag first thing |
This is one of the easiest wins in family packing. If the first-night items are grouped together, the trip starts feeling more manageable right away.
Longer vacations need a restocking plan, not just a bigger suitcase
Longer vacations tempt parents to double everything. Sometimes that is necessary. More often, it creates heavier bags without really solving the bigger problem, which is how the family will reset clothes, snacks, diapers, medicine, and other basics during the trip.
For longer trips, I pack with resupply in mind:
- how often can clothes be washed
- can snacks be replaced easily
- what medicine needs to come from home
- what baby or toddler items are hard to buy on arrival
- what can stay lighter because laundry or shopping is realistic
A longer-trip packing check looks like this:
| Item type | Usually better to pack more of | Usually better to restock or wash |
| medicine and health basics | Yes | No, if hard to replace quickly |
| favorite comfort and sleep items | Yes | No, replacements rarely help much |
| clothes for kids | Some extras, but not endless amounts | Yes, if laundry is available |
| snacks | Enough for travel days and first stretch | Yes, if stores are easy to reach |
| diapers or pull-ups | Enough for the trip start or if your brand matters | Often yes, depending on destination |
Longer vacations usually work best when the bags are built around the first stretch of the trip and the things that truly cannot be replaced easily. That keeps the packing realistic without turning every longer trip into a full household move.
The master clothing packing list for babies and toddlers
Clothing is the part of a family travel packing list that looks easiest and goes wrong fastest. Most parents do not forget clothes completely. We forget the right kind of clothes, the right number of backups, or the one layer that would have made the day easier. With little kids, clothing does more than keep them dressed. It helps with sleep, weather changes, spills, diaper leaks, messy meals, and the kind of mid-trip reset that can turn a rough hour around.
That is why I never pack kids’ clothes like I pack my own. I am not building outfits. I am building coverage. I want enough everyday clothes to get through the trip, enough backups to handle the messes I can already see coming, and enough layering to deal with cold airports, warm cars, hotel rooms, playground stops, and unexpected weather.
A simple clothing framework helps:
| Clothing category | What it needs to do |
| Everyday outfits | Cover normal play, meals, naps, and outings |
| Spare outfits | Handle spills, leaks, muddy shoes, and rough travel days |
| Layers | Adjust quickly to changing temperatures |
| Pajamas | Support bedtime, naps, and first-night access |
| Socks and shoes | Keep up with the child’s actual movement and trip type |
| Weather pieces | Solve sun, cold, wind, or rain without overpacking |
Everyday outfits should match the trip you are actually taking
This is where I see a lot of overpacking start. Parents try to cover every possible version of the trip instead of packing for the one they actually booked. A beach trip, a city trip, a road trip, and a long weekend at family’s house do not all need the same kind of everyday clothes.
For babies and toddlers, everyday outfits should be built around:
- how messy the child usually gets
- how often you expect to do laundry
- what the main daytime activities look like
- whether the trip involves more transit, more outdoor time, or more meals out
I usually think in “days plus margin,” not outfit counts that sound neat on paper. If the trip is three days, I do not automatically pack three outfits. I pack enough for the normal day plus the realistic mess factor of that child.
A simple way to think about it:
| Trip length | Better way to pack everyday outfits |
| 1 night | 2 day outfits if the child is usually messy |
| 2 to 3 nights | 1 outfit per day plus a little margin |
| 4+ nights | 1 outfit per day, then decide based on laundry access and mess level |
This is also where trip type starts changing the clothing list. If the family is packing for an outdoor-heavy trip, how to hike with a toddler is worth reading before you finish the clothing pile because the right everyday outfit for trails, parks, and outdoor stops is not the same as the right outfit for airports and restaurants.
Spare outfits matter more than parents want them to
The extra outfit is one of those items that feels excessive until the first real mess happens. Then it becomes the thing that saves the next few hours. Babies need spares for spit-up, leaks, and blowouts. Toddlers need them for food, puddles, potty misses, dirt, and the random messes that seem to happen more often away from home.
I do not think of spare outfits as “just in case” clothes. I think of them as recovery clothes.
The number changes by age and trip style, but the logic stays the same:
- one spare outfit should stay very easy to reach
- additional extras can stay in the main luggage
- the messier the child and the longer the transit day, the more those spares matter
A useful split looks like this:
| Where the spare clothes go | What should stay there |
| Within reach during travel | One full outfit change |
| Carry-on or main day bag | One more backup if the travel day is long |
| Main luggage | The rest of the trip’s extra clothing |
This is one reason I pack the first backup outfit differently from the rest. I want that one folded as a full reset: top, bottoms, socks, and if needed, a simple layer. I do not want to be piecing a clean outfit together while a child is already upset.
Layering usually works better than packing heavier clothes
Layers give families more control than heavier single-purpose clothes. A baby can go from a warm car to a cold airport to a stuffy gate in less than an hour. A toddler can be cold in the morning, hot by lunch, and damp from water play by the afternoon. Layers let you respond without repacking the whole day.
That is especially important with little kids because they are not always great at telling you what feels wrong. Often, the clothes are what need adjusting before the mood improves.
The American Academy of Pediatrics points parents toward the same general approach in different contexts: lighter, workable layers tend to be more useful than bulky clothing, and infants often need one more layer than adults in cold conditions.
A simple layering system:
| Layer type | Job |
| Base layer | Comfortable against the skin and easy to wear all day |
| Middle layer | Warmth that can be added or removed fast |
| Outer layer | Protection from wind, cold, or weather when needed |
For most trips, I would rather pack a few thin layers that can mix easily than one bulky piece that only works in one temperature range.
Pajamas do more work than people think
Pajamas are not just sleep clothes on a family trip. They help with bedtime, naps, late arrivals, early-morning transitions, and the first-night routine in a new place. That is why I treat them as part of the sleep setup, not just part of the clothing list.
For young kids, I want pajamas to do three things:
- feel familiar
- work for the room temperature I am most likely to get
- be easy to reach on the first night
A simple pajama plan:
| Trip type | Better pajama choice |
| Hotel or city stay | Easy, familiar sleepwear with light layering options |
| Outdoor or cooler-weather trip | Warmer sleepwear with socks or extra layer nearby |
| Hot-weather trip | Lighter sleepwear that still feels normal at bedtime |
The biggest pajama mistake is packing them too deep. After a long travel day, the pajamas should be one of the first clothing items you can grab.
Socks and shoes should match the real day, not the ideal outfit
Shoes are one of the easiest places to overpack and one of the fastest ways to make the trip harder. Most babies and toddlers do not need a big shoe lineup. They need shoes that actually fit the trip, are easy to get on and off, and can handle the kind of movement the day will ask for.
For babies, that may mean very little beyond weather-appropriate foot coverage. For toddlers and preschoolers, it usually means one main everyday pair and, if the trip calls for it, one second pair that solves a specific problem like water, mud, or colder weather.
I usually pack shoes by function:
| Shoe type | When it earns a place in the bag |
| Everyday walking shoe | Almost always |
| Sandals or water-friendly shoes | Beach, splash-heavy, or hot-weather trips |
| Warmer backup shoe or boot | Colder or wetter trips |
| Dressier extra pair | Only if the trip clearly needs it |
Socks matter for the same reason layers matter. They are a small item that can solve a big comfort problem fast. Wet socks, sandy socks, and cold socks can change a child’s mood quickly, so I like having a few more pairs than the outfit count alone would suggest.
Weather-specific pieces should solve one clear problem
Weather items are where lists get bulky fast. I try not to pack “weather clothes” as a vague category. I pack them as problem-solvers. What am I actually trying to cover: sun, cold, wind, rain, or temperature swings?
That keeps the list much tighter. Instead of tossing in three extra jackets and hoping for the best, I want one or two pieces that clearly handle the conditions the family is likely to get.
A simple weather check:
| Weather issue | Piece that usually matters most |
| Cold mornings or strong air conditioning | Light extra layer |
| Wind or light rain | Outer layer that packs easily |
| Hot sun | Hat, light long-sleeve option, breathable clothes |
| Mud, puddles, damp ground | Easy-change bottoms and extra socks |
This is also where I try to be honest about the trip. If the forecast and itinerary point to one kind of weather, I pack for that first and leave behind the “maybe” items that add bulk without doing much work.
How many extras to bring and why
This is the part parents always want turned into one neat formula, and it usually does not work that way. The right number of extras depends on three things:
- how messy your child normally is
- how easy laundry or rinsing will be
- how hard the travel day itself is likely to be
A child who rarely spills and has laundry access at the destination does not need the same margin as a child who is still in diapers, eats messily, and has a full flight day before bedtime.
What I usually use is a “base plus margin” approach:
| Clothing type | Base amount | Add more if… |
| Everyday outfits | One per day | Child gets messy often or laundry is hard |
| Spare outfits | One easy-access backup plus a few extras | Travel days are long or child is in a messy stage |
| Pajamas | One per night or every other night depending on age and mess | Child sweats, leaks, or bedtime routines are messy |
| Socks | More than the outfit count | Weather, water, dirt, or extra movement is part of the trip |
The reason for the extras is not to build a giant suitcase. It is to create enough margin that one bad meal, one diaper leak, or one rainy afternoon does not force you into laundry or shopping sooner than you planned.
Diapering, potty, and cleanup essentials
This is one of the highest-value parts of any family travel packing list because these are the items that get used over and over again on real travel days. Clothes matter. Shoes matter. But diapering and cleanup supplies are usually the things that keep a small problem from turning into a long, stressful one.
I always think about this section in two layers:
- what the family will need across the whole trip
- what needs to stay close enough to fix the next mess fast
That second layer matters most. A box of diapers in the suitcase does not help much if the blowout happens in the airport, at a rest stop, or halfway through lunch on the road.
A simple diapering-and-cleanup framework:
| Category | What it should cover |
| Diapering basics | Diapers or pull-ups, wipes, changing support |
| Potty support | Training items, backup clothes, easy cleanup |
| Mess control | Disposal bags, cleanup cloths, wet or dirty storage |
| Laundry and reset | A plan for dirty clothes before and after washing |
Diapers and pull-ups should be packed for the travel day first
This is where I start. Before I think about how many diapers the whole trip might need, I make sure the travel day is covered well. Delays happen. Kids drink more or less than usual. Diaper changes happen at awkward times. A packing system works better when the first layer is built around the longest stretch before the family can settle in properly.
For babies and toddlers who still need diapers or pull-ups, I want:
- enough for the full transit day
- a few extras beyond the planned timing
- one small set packed where I can grab it fast
- the rest packed with the main trip supplies
A practical split usually looks like this:
| Where they go | What belongs there |
| Within reach | The next few diapers or pull-ups |
| Carry-on or day bag | Enough for the full travel window plus margin |
| Main luggage | The rest of the trip supply or overflow stock |
This is also where the list changes by child stage. A child in full-time diapers needs a different margin than a child using pull-ups only for sleep or long car rides. A potty-training toddler may need fewer diapers but more clothing backups, wipes, and cleanup flexibility.
Wipes, changing mats, and diaper cream need to work as one kit
These items do more work than almost anything else in family travel. Wipes handle diaper changes, sticky hands, tray tables, snack messes, spills, and quick cleanups that have nothing to do with diapering at all. A changing mat turns awkward spaces into usable ones. Diaper cream matters more once you are dealing with heat, longer travel windows, irregular change timing, or a child whose skin gets irritated fast.
I like treating these as one working kit instead of three separate items.
A diaper-change kit usually includes:
| Item | Why it matters |
| Wipes | Diapering, cleanup, meals, hands, surfaces |
| Changing mat | Makes fast changes easier in imperfect spaces |
| Diaper cream | Helps when longer travel days are rough on skin |
| One diaper or pull-up | Immediate use item that should never be buried |
The reason I keep this grouped is simple: when a child needs changing, I do not want to build the setup from three parts of the bag.
Disposal bags, cleanup cloths, and laundry strategy matter more on travel than at home
At home, dirty clothes and trash have somewhere obvious to go. While traveling, they do not. That is why cleanup usually needs its own plan. A diaper bag or travel bag feels much more usable when there is a clear way to separate dirty clothes, used wipes, wet items, and the little messes that pile up over a long day.
This is where I like having:
- a few disposal bags
- one wet or dirty-clothes bag
- extra cloths or small towels for bigger messes
- a simple laundry plan for the destination
A practical cleanup view:
| Mess type | What usually helps |
| Dirty diaper or pull-up | Disposal bag plus wipes |
| Wet or soiled clothes | Dirty-clothes bag or wet bag |
| Sticky meal mess | Wipes plus cleanup cloth |
| Repeated small messes over several days | Laundry plan, not just more clothes |
The laundry part matters because cleanup is not just about the moment of the mess. It is also about recovery later. If the family can rinse, wash, or isolate messy items easily, the packing list does not have to carry the full weight of every possible accident.
Potty training travel items need to be packed for misses, not just success
Potty-training trips can make parents pack too little or too much. If you pack as if the child is fully trained, the first accident becomes a bigger problem than it needs to be. If you pack as if nothing has changed, the bag gets bulky fast. What usually works best is a middle setup that supports success but still assumes there may be misses on travel days.
Travel changes timing. Kids get distracted, sit longer than usual, drink differently, and end up in places where bathrooms are harder to reach. That is why potty-training items need to stay more active in the packing system than they do at home.
A good potty-training setup often includes:
| Item | Why it helps |
| Extra underwear or training pants | Fast reset after a miss |
| One spare outfit | Clothes need changing more often than at home |
| Pull-up if your family still uses one in transit | Useful for sleep or long travel windows |
| Wipes | Cleanup is usually more involved than a simple bathroom stop |
| Small disposal or dirty-clothes bag | Keeps wet items separate from the rest of the bag |
The biggest mistake here is packing for the version of the child you hope shows up instead of the version who is traveling, tired, off-routine, and more likely to need backup.
Cleanup cloths should be packed like daily tools, not extras
Cleanup cloths do quiet work on family trips. They help with wet hands, messy meals, car-seat spills, diaper changes, hotel sink rinses, and all the little moments when wipes are not quite enough. They do not take much space, but they can save a lot of trouble.
I usually like having a few different kinds:
- one or two soft cloths for mealtime or hands
- one slightly sturdier cloth for bigger messes
- one backup cloth in the main bag so the system does not fall apart after the first use
This is one of those categories that earns its place because it gets reused across the whole trip.
A simple cleanup-cloth setup:
| Cloth type | Best use |
| Soft cloth | Faces, hands, quick wipe-downs |
| Sturdier cloth | Bigger messes, car or seat cleanup, travel-day accidents |
| Backup cloth | Replaces the first one once it is dirty |
These are not glamorous items, but family travel usually works better when the practical tools are easy to reach.
Laundry strategy on the go matters more than bringing endless extras
A lot of overpacking starts when families try to solve every possible clothing mess with more clothes instead of a better reset plan. Sometimes that is necessary. More often, it is easier to bring a simple laundry strategy than another full stack of backups.
That can mean:
- knowing whether the hotel or rental has laundry access
- planning one sink-wash option for small kid items
- keeping a separate dirty-clothes bag so the clean items stay usable
- bringing enough extras for the travel days, then leaning on washing during the trip if needed
A simple laundry plan:
| Travel setup | Best laundry approach |
| One- or two-night trip | Mostly solve with packed backups |
| Longer hotel stay | Check laundry access or nearby service |
| Rental or family stay | Use washer access to keep clothing volume lower |
| Road trip with several stops | Keep one dirty-clothes bag and rotate outfits more intentionally |
Laundry is part of the packing system because it changes how many extras the family really needs. When the reset plan is clear, the diapering and cleanup section stops feeling endless.
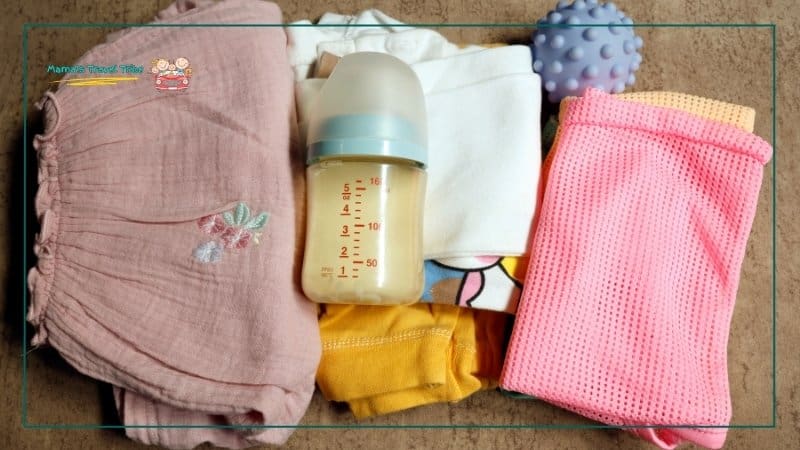
Feeding and mealtime packing

Feeding gear can make a trip feel smooth or make it feel like you are always one spilled cup behind. This section is where a packing list for traveling with a baby looks very different from a packing list for traveling with a toddler, even if both kids are on the same trip. Babies often need a more exact setup. Toddlers usually need more flexibility, more snacks, and a better plan for eating when the day drifts off schedule.
I do not pack food and feeding items as one loose category. I pack them as a working system. What does the child need to drink? What does the child need to eat? What helps with cleanup? What needs to stay close on travel day, and what can stay packed until we arrive?
That is the part that keeps this section from turning into a random shopping-style list. A family meal setup should support three things:
- normal feeding
- delayed feeding
- messy feeding
A simple feeding system looks like this:
| Feeding category | What it needs to solve |
| Bottles and milk support | Regular feeds, delays, airport or road-trip timing |
| Mealtime tools | Bibs, utensils, cups, containers, simple serving |
| Snack structure | Hunger, waiting time, missed meals, pacing |
| Cleanup support | Wipes, cloths, bags, backup clothing |
Bottles need to be packed for access, not just quantity
For babies, bottles are one of the easiest things to technically pack and one of the easiest things to pack badly. The issue usually is not whether the bottles made it into the bag. It is whether the next bottle, the next feed, and the basic cleanup supplies are easy to reach when timing shifts.
That matters because travel days stretch feeding windows. A normal feed can happen in the car, at the gate, in a hotel room that is not ready yet, or halfway through a long stop. That is why I like treating bottles as a quick-access setup, not just part of the suitcase.
A bottle setup usually works best when it includes:
- the bottles you need for the immediate travel stretch
- the supplies that go with them
- one simple cleanup layer
- enough structure that another adult could find the system quickly too
A good bottle split looks like this:
| Where it goes | What belongs there |
| Within reach | The next bottle or feeding round |
| Carry-on or travel bag | The rest of the travel-day bottle setup |
| Main luggage | Overflow feeding supplies for later in the trip |
Formula supplies should be packed as one complete feeding system
Formula feeding gets much easier on trips when the supplies stay together. I do not want the formula in one pouch, the bottle parts in another, and the cleanup items somewhere else. When the day gets long, that kind of packing always creates extra work.
The FDA’s infant formula travel guidance is practical on this point too. It stresses safe preparation, storage, and handling, which matters even more when the trip includes delays or long transit windows.
For travel, I usually want the formula system to answer four questions:
- how is the next bottle getting made
- what happens if the feed is delayed
- what happens if the bottle gets spilled or refused
- what do I need to clean up afterward
A simple formula system:
| Part of the system | Why it matters |
| Formula itself | Core feeding supply |
| Bottle setup | Lets the feed happen without repacking the whole bag |
| Water plan | Makes the feeding system usable in transit |
| Cleanup items | Keeps one feed from turning into a bigger mess |
Breastfeeding support items should stay light and useful
When a parent is breastfeeding, the packing list usually works better when it stays focused on support, not extras. The point is not to build a giant feeding kit. It is to bring the few things that make feeding easier when the day is long, public, or off schedule.
That can look different from one family to another, but I usually think in terms of comfort and reset:
- one or two nursing-friendly clothing choices
- a burp cloth or cloth that is easy to grab
- anything the parent normally uses that actually makes feeding easier away from home
- a simple backup plan for a rough travel stretch
This is one of those areas where less can be better. If the support items are small, familiar, and actually used at home, they tend to travel well.
Bibs, utensils, and cups matter more once the child is eating like a traveler, not a baby
Once a child starts eating more solids or toddler-style meals, the list changes fast. Bottles may matter less, but bibs, utensils, cups, and snack containers start doing much more work. The feeding setup is no longer just about getting food in. It is about helping the child eat in different places, with less routine, and often with more mess.
This is where I like to keep things simple:
- one or two bibs that are easy to rinse or wipe
- one cup setup that the child already knows well
- utensils only if they truly help
- containers that make snacks and simple meals easier to portion
A practical mealtime kit:
| Item | Best job |
| Bib | Keeps outfit changes lower on messy days |
| Familiar cup | Helps with drinking when routine is off |
| Utensils | Useful if the child eats better with their usual setup |
| Snack container | Makes small food portions easier to manage |
Snack containers make food easier to pace instead of dumping it all at once
Snack containers do more than hold food. They help with timing, portioning, and mess. When snacks are loose in one big bag, they tend to get handed out too early, spilled too widely, or used up before the hard part of the day even starts. Containers give the parent a way to break food into smaller rounds, which usually works much better for babies moving into solids, toddlers who snack in waves, and preschoolers who eat more steadily but still drift in and out of hunger on travel days.
I like snack containers because they help me pack with a purpose:
- one for the first waiting stretch
- one for the middle of the trip
- one backup that stays closed until it is actually needed
That keeps the food useful longer and makes it much easier to see what is left without digging through wrappers or loose snacks.
A simple way to think about it:
| Snack container use | What it helps with |
| First snack round | Early waiting, light hunger, airport or road-trip transitions |
| Middle snack round | Delays, cranky stretches, longer travel windows |
| Backup snack round | Late arrival, missed meal, overtired child |
| Mess-control container | Slower snacks that are easier to portion and hand over gradually |
This is one of those small packing choices that ends up shaping the whole feeding rhythm of the day.
Spill-proof cups need to match the child, not just the trip
A spill-proof cup only helps if the child already uses it well. Travel is not the best time to introduce a cup that looks clever but slows everything down because the child refuses it, cannot open it, or gets frustrated trying to drink from it. I would much rather pack the familiar cup that works than the one that seems more “travel-friendly” on paper.
For toddlers and preschoolers especially, the cup does a lot of work:
- it keeps water or milk easier to manage during long stretches
- it reduces the chance of one drink turning into a full clothing change
- it makes the child’s routine feel more normal during transit
A useful cup check looks like this:
| Cup question | Better answer |
| Does the child already use it easily? | Yes |
| Can it travel without leaking all over the bag? | Yes |
| Is it easy for an adult to refill or clean on the go? | Yes |
| Does it solve more problems than it creates? | Yes |
If the cup fails one of those tests, I usually leave it home.
A backup meal strategy matters more than parents expect
A lot of feeding trouble on trips starts when everyone is assuming the next real meal will happen on time. Then the airport line runs long, the road trip stop is disappointing, the hotel check-in drags, or the child is too tired to eat what looked fine on paper. That is where the backup meal matters.
I do not mean packing full meals for every stage of the trip. I mean having one realistic option that can bridge the gap when the main plan falls apart. That backup might be:
- a more filling snack setup
- simple toddler-safe foods that travel well
- one familiar meal option the child usually accepts without much resistance
The point is to prevent a bad stretch from turning into a hunger crash.
A practical backup meal view:
| Situation | Backup meal approach |
| Long airport or flight delay | More filling snack and drink plan |
| Road trip meal stop goes badly | Keep one simple familiar option packed |
| Late hotel arrival | Have enough to cover the first stretch before you can fully unpack |
| Child refuses unfamiliar food | Use the familiar fallback instead of forcing the issue |
This is one reason I never pack feeding around the ideal version of the trip. I pack around the version where meals run late and someone is already tired by the time the food shows up.
What to keep within reach on travel day
This is the part of feeding and mealtime packing that makes the whole system work. It is not enough to bring the right bottles, cups, bibs, and snacks if the next feeding items are packed too deep to use easily. On travel days, the feeding setup needs its own immediate-access layer.
What I usually want within reach is:
- the next bottle, cup, or drink option
- one bib if the child still needs one
- the next snack round, not the whole snack supply
- one quick cleanup layer
- one more substantial food backup that stays close but not necessarily in hand
That split matters. The next-use item should be easy to grab. The rest can stay in the main travel bag until it is needed.
A practical within-reach feeding setup:
| Keep within reach | Keep in the main travel bag |
| Next bottle or cup | Extra bottles or extra drink supplies |
| One small snack round | The rest of the snack containers |
| One bib | Backup bibs |
| Wipes or cleanup cloth | Bigger cleanup kit |
| One meal fallback | Overflow food for later in the trip |
This is where the feeding section stops being a list and starts becoming a system. If the child’s next food and drink are easy to reach, the whole trip usually feels a lot more manageable.
The sleep packing checklist for travel with kids
Sleep packing does more work than people think. Parents usually focus on clothes and snacks first, but on a real trip, sleep items often decide how the first night goes, how naps go, and how much recovery the child gets after a long travel day. A child who can settle more easily usually handles the rest of the trip better too.
That is why I do not treat sleep as one small section of the suitcase. I think of it as its own packing category with a clear job: make sleep feel familiar enough that the child has a decent chance of resting, even in a different room, on a different schedule, or after a messy travel day.
A simple sleep packing framework:
| Sleep category | What it should solve |
| Sleep-space setup | Gives the child a usable place to sleep |
| Comfort and routine | Makes bedtime feel familiar |
| Light and sound support | Helps with naps, early mornings, and noisy rooms |
| Backup sleep support | Helps when the plan slips and the child gets overtired |
Crib or sleep-space setup items should be packed around the first night
The sleep-space question changes by trip. Some families are arriving at a hotel with a crib already requested. Some are using a pack-and-play. Some are sharing one room and trying to make the layout work with what is already there. Whatever the setup is, I want the first-night sleep items packed together and easy to grab.
That usually means the bag or pouch for sleep setup includes the things that turn a random room into a workable sleep space:
- the child’s main sleep clothing
- one or two familiar sleep supports
- anything needed for the actual sleep setup on arrival
- the first-night bedtime basics, not buried in the middle of the suitcase
A useful first-night sleep view:
| Arrival-night sleep problem | Item that usually matters most |
| tired child, late check-in | pajamas and bedtime basics easy to grab |
| room is not set up yet | sleep-space items grouped together |
| child is overtired and resisting | familiar comfort support already within reach |
| parent is exhausted too | no digging through several bags for bedtime items |
The point is not to recreate home perfectly. It is to make bedtime functional before everyone is too tired to think clearly.
Favorite blanket, sleep sack, or familiar sleep item usually matters more than extra pajamas
Parents sometimes overpack sleep clothes and underpack the thing that actually helps the child settle. A familiar blanket, sleep sack, lovey, or other comfort item often does more for bedtime than one more backup pair of pajamas sitting in the bottom of the suitcase.
For babies, that might be a sleep sack or one specific sleep routine item. For toddlers and preschoolers, it is often the comfort object that signals bedtime even when everything around them feels different.
A good way to think about sleep items:
| Sleep item | Why it matters |
| Sleep sack or familiar sleepwear | Makes the body feel more like home |
| Comfort item | Helps with transitions and bedtime resistance |
| Familiar blanket if already part of sleep | Can make a new room feel less new |
| Backup comfort item if truly needed | Helps if the main item gets lost or dirty |
This is one area where I try not to get clever. I pack what already works. Travel is usually not the best time to test a new sleep setup.
White noise and blackout help are small items that do a lot of work
These are two of the easiest things to underestimate before a trip. A room that seems fine to an adult can feel much harder for a child who is trying to nap in full daylight or sleep through hallway noise, street sounds, voices, or early-morning light. White noise and blackout support often earn their place because they help in several different situations, not just bedtime.
I think of them as problem-solvers, not accessories:
- white noise helps with hotel noise, shared rooms, and sudden sound changes
- blackout help supports naps, early mornings, and bright rooms
- both help more when they are part of the child’s normal rhythm already
A quick sleep-environment check:
| Room issue | Sleep support that usually helps |
| bright nap room | blackout support |
| hallway or street noise | white noise |
| sibling or shared-room disruptions | white noise plus familiar routine |
| early wake-ups from light | blackout support first |
These are also some of the few sleep items that can improve the trip for both babies and older kids at the same time. When sleep starts feeling shaky on a trip, the room setup usually matters more than one more cute bedtime extra.
Bedtime comfort items should travel like essentials, not extras
Bedtime comfort items are some of the highest-value things in the sleep bag because they help when the room is unfamiliar, the day ran long, or the child is already overtired before bedtime even starts. For a lot of kids, the comfort item is the part of sleep that still feels the same when everything else is different.
I try to keep this category very honest. If the item already helps at home, it deserves space in the bag. If it never really mattered at home, I do not suddenly expect it to save bedtime on a trip.
A simple comfort-item check:
| Comfort item | Why it earns space |
| Lovey or stuffed toy | Helps with settling and transitions |
| Familiar blanket | Makes the sleep space feel more normal |
| Pacifier if still used for sleep | Supports naps and bedtime without extra work |
| One backup only if truly needed | Helps if the main item gets lost or dirty |
This is also the category I protect the most. A comfort item that ends up buried in the suitcase or left in the car is one of those small packing mistakes that can make the whole evening harder than it needed to be.
Pajamas and bedtime routine items should be packed like first-use items
Pajamas are not just one more clothing category when you are traveling with little kids. They are part of the bedtime signal. The same is true for the small routine items that tell the child the day is winding down. That is why I want bedtime things packed for access, not just packed somewhere.
A useful bedtime bag usually covers:
- pajamas
- whatever the child normally sleeps in or with
- one or two routine items that matter most
- the pieces you would want first on arrival night
A first-night bedtime view:
| Bedtime item | Why it should stay easy to reach |
| Pajamas | Usually needed soon after arrival |
| Toothbrush or wash-up basics if part of the routine | Helps bedtime feel normal |
| Sleep clothing extras if the child runs hot, cold, or messy | Keeps bedtime from turning into a luggage search |
| Main comfort item | Often matters more than any extra clothing |
The reason I treat these like first-use items is simple: bedtime gets harder fast when the child is tired and the routine still has to be assembled from three different bags.
What matters most when sleep goes off-plan
Sleep goes off-plan on trips all the time. A nap gets skipped. The room is brighter than expected. The child is too wound up from the travel day. The bedtime runs late. This is where the sleep packing list really proves itself. When the ideal version of bedtime falls apart, the useful question is not “How do I get back to perfect?” It is “What matters most right now?”
Usually, the answer is the smallest set of familiar things that help the child reset:
- the usual comfort item
- sleep clothing that feels normal
- one sound or light support that still helps
- enough margin in the evening that the whole family is not scrambling
A rough-sleep reset often looks like this:
| When sleep goes off-plan | What usually matters most |
| Missed nap | Earlier bedtime support and easy access to comfort items |
| Very late arrival | First-night sleep bag ready to go |
| Bright or noisy room | White noise and blackout help |
| Child is overtired and resisting | Fewer choices, simpler routine, familiar sleep anchors |
That is why I think sleep packing works best when it is built around the hardest version of the day, not the smoothest one. If the system still works when everyone is tired, it is probably a good system.
Health, medicine, and first-aid packing
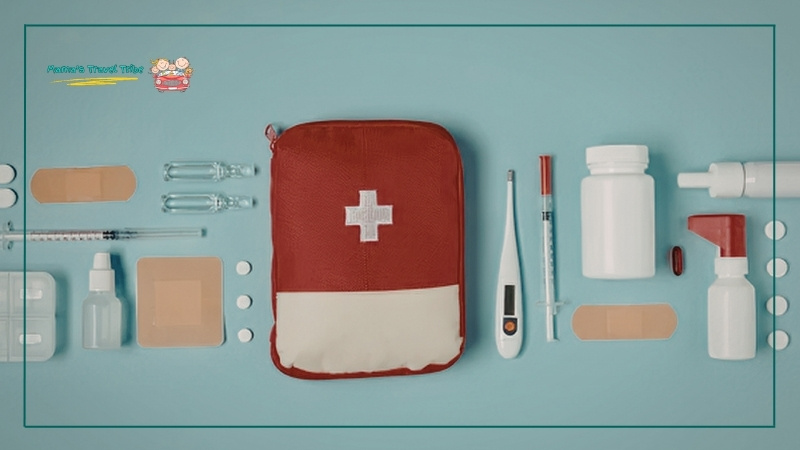
This is the category that parents usually feel best about once it is packed and worst about if it is forgotten. Health items do not take much space compared with clothing or gear, but they do a lot of work when the day starts going wrong. A child with a fever on the first night, a scraped knee on a playground stop, or a nose that suddenly gets stuffy on a flight can turn a small gap in the bag into a much bigger problem.
That is why I never treat health packing as a last-minute add-on. I treat it like its own working kit. I want the medicine and first-aid items that would actually matter on this trip, packed in a way that makes them easy to find and easy to use without unpacking the whole family bag.
A simple health-packing structure:
| Health category | What it should cover |
| Daily essentials | Anything the child uses regularly and cannot skip |
| Short-term basics | Fever, pain, small cuts, mild congestion, skin issues |
| Travel support | Sunscreen, bug protection, nasal support, hydration help if relevant |
| Documentation | Insurance card copy, emergency contacts, medication details |
The CDC’s travel health guidance fits well with this approach. It recommends bringing a travel health kit with prescription medicines, over-the-counter medicines you may need, and first-aid supplies, especially for items that may be harder to replace while traveling.
Regular medications should be packed first, not added later
If a child takes something regularly, that item belongs at the top of the health list, not at the bottom. I would rather forget three optional extras than leave behind one medication the child actually depends on. This is true whether the trip is one night or two weeks. The regular item is always the first one that matters.
That also means packing it in the right place. If it is something the child may need during the travel day, I want it in the carry-on or day bag, not buried in the suitcase. The CDC advises travelers to keep medicines in carry-on luggage in case bags are delayed or lost, which matters even more when the medicine is for a child.
A simple medication check looks like this:
| Medication type | Better place to pack it |
| Daily medication | Carry-on or day bag |
| Time-sensitive medication | Carry-on or personal item |
| Backup supply | Main travel health kit, with some still kept close |
| Medication record or instructions | Health pouch or phone backup |
I also like a quick written note or photo with the medication name and dosing information if another adult might need to help.
Fever and pain relief basics belong in the health kit, even on short trips
This is one of the easiest things to leave out by accident because parents assume a short trip will stay simple. But fever and pain issues do not care whether the trip is a quick weekend or a full vacation. If a child spikes a fever after arrival or wakes up uncomfortable in the middle of the night, the health bag needs to cover that without a late scramble to find an open store.
For most families, this part of the kit is small:
- the child-safe fever or pain relief they already use at home
- dosing tool if needed
- the thermometer that actually works and is easy to read
- one or two tiny first-aid basics for small injuries
A practical fever-and-pain setup:
| Item | Why it matters |
| Child-safe fever or pain relief | Covers the most common overnight or travel-day issue |
| Dosing tool | Makes the medicine usable when you are tired |
| Thermometer | Keeps guesswork lower when the child feels off |
| Small first-aid basics | Helps with cuts, scrapes, and minor bumps |
I do not pack a full medicine cabinet. I pack the things I would most regret not having in the first few hours of a problem.
Thermometer, bandages, and small first-aid items help more than a giant kit
A travel first-aid setup for young kids should stay small and useful. Giant first-aid kits sound organized, but most family trips only need a handful of basics. What tends to matter is whether the parent can find the thermometer quickly, whether there is something for a scraped knee, and whether the small health items stay in one place instead of scattering through the bags.
That is why I usually keep the first-aid side of the health bag very simple:
| First-aid item | What it usually solves |
| Thermometer | Fast temperature check when a child seems unwell |
| Bandages | Playground and travel-day scrapes |
| Saline or simple nasal support if your child uses it | Stuffy nose support, especially during travel |
| Skin support relevant to your child | Minor irritation, dryness, or sensitive-skin problems |
The simpler the health pouch is, the more likely it actually works when everyone is tired and the room is dark.
Saline or nasal support matters most on long travel days and overnight arrivals
This is one of those items that feels optional until a child is stuffy, uncomfortable, and trying to settle somewhere new. If your child already uses saline, nasal spray support, or another simple congestion routine at home, it usually makes sense to bring it. I would not pack something new just because travel is happening, but I do want the items that already help when a child is struggling to breathe comfortably, sleep, or drink as easily as usual.
This matters more on:
- flight days
- dry hotel rooms
- colder-weather trips
- late arrivals when stores are closed
- trips where a child already tends to get congested easily
A simple nasal-support check:
| If your child tends to have this issue | It may be worth packing |
| stuffy nose during travel or weather changes | saline or the nasal support you already use |
| trouble sleeping when congested | bedtime-friendly support already familiar to the child |
| discomfort with dry air or long travel windows | one small congestion-relief item in the health pouch |
I think of this category the same way I think of comfort items: if it already helps at home, it is much more likely to help on the road too.
Sunscreen and bug protection belong in the health kit when the trip actually calls for them
These two items work best when they are packed as part of the health-and-protection category, not tossed into a side pocket at the last second. On the wrong trip, they do nothing but add clutter. On the right trip, forgetting them can make the next several hours harder than they need to be.
I usually include them when the trip includes:
- beach time
- playgrounds or parks
- outdoor meals
- hiking, camping, or longer walks
- warm-weather evenings
- destinations where the family will be outside for long stretches
A practical way to think about it:
| Trip type | What often earns a place |
| beach or pool trip | sunscreen first, bug support if evenings are outdoors |
| hiking or camping trip | both, plus easy-access cleanup |
| city trip with mostly indoor plans | maybe sunscreen, often less need for bug support |
| short cool-weather weekend | sometimes neither, depending on the forecast |
This is one place where being honest about the itinerary helps. If the family is not really spending time outside, these can stay out. If the trip includes long outdoor stretches, they should not be an afterthought.
Emergency contact and insurance details are part of the health system too
Parents often think of these as document items, but I like keeping health-related contact details with the health bag or at least closely tied to it. If a child gets sick away from home, the issue is not just whether you packed medicine. It is also whether you can get to the information you need quickly without opening five different apps and bags.
What I like having ready:
- emergency contact numbers
- insurance card copy or photo
- pediatrician or primary contact if that would help
- any allergy or medication information that another adult might need
A simple setup looks like this:
| Information | Best place to keep it |
| Insurance details | Travel folder and phone backup |
| Emergency contacts | Phone and one printed copy |
| Allergy or medication notes | Health pouch or travel folder |
| Child health basics another adult may need | One short written note |
This is one of those categories that usually does nothing the whole trip, which is exactly what you want. But if you need it, you usually need it right away.
Before planning any trip, ensure you can guarantee your family’s safety. Read our guide on family travel safety guidelines for more information.
What stays in the carry-on vs the suitcase
This is where the health category either works well or falls apart. The rule I use is simple: if the item could matter during the travel day or in the first few hours after arrival, it stays with me. If it is useful for the trip but not urgent, it can stay packed in the main luggage.
A practical split:
| Keep in the carry-on or day bag | Can stay in the suitcase |
| daily medication | backup quantities of non-urgent basics |
| fever or pain relief | extra health supplies not needed during transit |
| thermometer | overflow care items |
| one or two small first-aid basics | duplicates or extras |
| nasal support if your child uses it often | less urgent protection items if the trip starts indoors |
The carry-on health bag should solve the likely problems of the travel day. The suitcase health bag can support the rest of the trip. Once those two jobs are separated clearly, this section gets much easier to pack and much easier to use.
Travel-day carry-on essentials for families
The carry-on is not the same thing as the suitcase, and it should not be packed like a smaller version of it. This bag has one job: get your family through the travel day without forcing you to open the whole trip every time something small goes wrong. For parents building a carry on packing list for toddlers or a packing essentials for flying with a baby setup, this is where the list needs to get much more practical.
I think of the carry-on as the bag that covers delays, spills, hunger, missed naps, quick clothing changes, and all the things that happen before you ever reach the hotel or unpack the car. If the suitcase is for the trip, the carry-on is for the day.
A simple carry-on framework:
| Carry-on category | What it should solve |
| Diapering and cleanup | Leaks, sticky hands, quick changes, small messes |
| Clothing | Fast resets after spills, accidents, or travel-day mess |
| Feeding and drinks | Hunger, thirst, delayed meals, comfort feeds |
| Health basics | Medicine and small problems you may need to handle in transit |
| Activities and comfort | Waiting time, boredom, rough transitions |
| Parent essentials | The few things the adult needs to stay functional too |
The TSA rules matter here more than parents expect because they shape what can realistically stay in the bag. TSA says medically necessary liquids, medications, and creams can be brought in carry-ons in amounts over 3.4 ounces, and it separately says liquid medications are allowed in reasonable quantities when declared at screening. That matters for kids because a lot of true carry-on essentials fall into that category.
Diapers should be packed for the full travel window, not just the scheduled trip time
This is one of the easiest carry-on mistakes to make. Parents pack for the flight time, the drive time, or the ideal route time, then the real day runs longer. A delayed departure, slow security line, longer meal stop, traffic backup, or late check-in can make a “two-hour trip” feel much longer from the child’s point of view.
That is why I pack diapers for the full travel window:
- the trip to the airport or start of the drive
- the waiting period before departure
- the actual transit time
- the first stretch after arrival
A practical split usually works best:
| Where diapering items go | What belongs there |
| Personal item or quickest-access pouch | The next diaper, a few wipes, one changing setup |
| Carry-on | The rest of the travel-day diaper supply |
| Main luggage | Extra stock for the rest of the trip |
For babies and diapered toddlers, the next change should never require opening every bag you packed.
Wipes and cleanup items need to stay more accessible than almost anything else
Wipes do not just cover diaper changes. They cover snack mess, sticky hands, mystery spills, tray tables, quick shoe cleanups, and the kind of messes that seem to happen exactly when you do not have room to deal with them properly. That is why I treat them as one of the most active items in the carry-on.
The carry-on cleanup setup usually works best when it includes:
- one easy-access wipe pack
- a few disposal or dirty-item bags
- one small cloth or stronger cleanup backup
- enough structure that you are not pulling wipes from the bottom of the bag every time
A useful cleanup view:
| Carry-on mess | What you want easy to grab |
| sticky hands or seats | wipes first |
| wet or dirty clothes | disposable or dirty-item bag |
| bigger spill | cloth plus wipes |
| repeated travel-day messes | restockable cleanup pouch |
If the day starts going sideways, wipes are usually one of the first things that make it feel manageable again.
Extra clothes belong in the carry-on even when the suitcase is full of them
This is one of those categories where “I packed it” is not enough. If the spare clothes are in checked luggage, buried in the trunk, or hard to reach in the overhead bag, they are not really solving the travel-day problem. A carry-on should always hold at least one full reset outfit for the child and, if the child is young enough or messy enough, one extra top for the adult handling them most.
The reason is simple. Spills, leaks, spit-up, food, and potty misses do not wait for arrival. When the child needs a new outfit, they usually need it right then.
A strong carry-on clothing plan:
| Person | What should stay in the carry-on |
| Baby | One full outfit change, sometimes two on longer travel days |
| Toddler | One easy-change outfit plus underwear or pull-up support if relevant |
| Preschooler | One spare outfit if the travel day is long or meal-heavy |
| Parent | One backup top if the child is likely to spill, leak, or vomit on them |
The carry-on outfit should be a full reset, not random spare pieces that still require hunting for socks or bottoms later.
Snacks need to be packed in rounds, not as one big stash
A lot of carry-on snack trouble comes from pacing, not quantity. Parents bring enough food, but it all gets handed over too early or packed in a way that makes the best options harder to reach later. What works better is a snack system built in rounds.
A carry-on snack setup usually works best with:
- one small early snack
- one slower middle-of-the-day snack
- one more filling option
- one backup snack that stays closed until the harder part of the day
That keeps the food useful instead of letting the whole snack plan disappear in the first hour.
A simple snack rhythm:
| Snack round | Best job |
| Early snack | Takes the edge off waiting without using up the good stuff |
| Middle snack | Helps through the long transit stretch |
| Filling snack | Covers delays or a missed real meal |
| Backup snack | Saved for the hard patch later |
This is one of the biggest differences between a general family vacation packing list with kids and a true travel-day carry-on list. The carry-on snacks are there to support timing and regulation, not just to “bring food.”
Bottles or cups should match the child’s real travel rhythm
This is where the carry-on often gets overloaded with good intentions. Parents bring every bottle, every cup, every possible feeding option, and then the useful item is still hard to grab when the child actually needs it. What works better is packing the next drink and the next backup clearly, not building a mini kitchen in the carry-on.
For babies, that usually means the bottle setup that covers the immediate travel stretch plus the next likely delay. For toddlers and preschoolers, it usually means one familiar cup that is easy to refill and easy for the child to use without turning every sip into a spill.
A simple drink setup:
| Travel-day drink need | What usually belongs in the carry-on |
| Baby’s next feed | One easy-to-reach bottle setup |
| Backup feed | The next bottle or feeding round, packed just behind it |
| Toddler or preschool drinks | One familiar cup plus refill plan |
| Delay support | Enough to cover a late departure or longer stretch than expected |
This is one of those categories where a familiar, workable setup matters more than anything that looks especially travel-friendly.
Medicine belongs in the carry-on if you could possibly need it before arrival
This is not where I get flexible. If there is any chance the child may need the medicine before the family is settled in at the destination, it goes in the carry-on. I would rather carry a small health pouch all day than realize after a delay or late arrival that the one thing we needed is in checked luggage or buried in the trunk.
The travel-day health pouch usually covers:
- daily medication
- fever or pain basics
- one or two small first-aid items
- anything the child depends on often enough that forgetting it would matter
A quick carry-on health split:
| Keep in the carry-on | Can stay in main luggage |
| daily and time-sensitive medication | extra quantities of non-urgent items |
| fever and pain relief basics | overflow health supplies |
| thermometer if the child has been off lately or travel is long | duplicates or refill items |
| any item you would regret not having until bedtime | items that only matter later in the trip |
The carry-on health pouch should solve the likely problems of the day, not every possible health issue of the whole vacation.
Entertainment should be packed as a rotation, not a toy collection
The carry-on activity setup works best when it is small and staged. A lot of parents overpack toys and underpack pacing. What helps more is having a few activities that can come out one at a time instead of one giant bag that gets dumped open too early.
For most travel days, I want:
- one simple familiar item
- one quiet hands-on option
- one easy book or paper-based activity
- one stronger backup for the hard stretch later
A useful travel-day activity view:
| Activity type | Best job in the carry-on |
| Familiar small toy or book | Easy first layer |
| Quiet hands-on item | Middle stretch or waiting time |
| Drawing, sticker, or paper item | Good when the child needs a task |
| Stronger backup activity | Saved for the later hard patch |
The carry-on works better when the entertainment is there to support the day, not fill every minute from the moment you leave home.
Cleanup supplies should solve the first mess fast
Cleanup items always earn their place. The carry-on version does not need to be huge, but it does need to be fast. If there is a leak, spill, or sticky child situation, the first cleanup should happen from the carry-on, not from the big luggage.
A simple carry-on cleanup setup:
- wipes
- one or two disposal or dirty-item bags
- one cloth or stronger cleanup support
- one small bag section that keeps those items together
A quick cleanup split:
| First mess problem | Carry-on item that should solve it |
| sticky hands or face | wipes |
| dirty clothes | disposable or dirty-item bag |
| spill on clothing or seat | wipes plus cloth |
| repeated small messes | restockable cleanup pouch |
This is one of the easiest categories to underbuild because it seems boring. On real travel days, it ends up doing a lot of the quiet work.
Parent essentials belong in the carry-on too
A carry-on that only supports the child is not a complete travel-day bag. The adult needs a few things too, because a parent who is dehydrated, hungry, without a charger, or constantly digging for basics will have a much harder day than a parent whose own needs are at least minimally covered.
I keep the parent side of the carry-on very small:
- phone and charger
- wallet and documents
- one water plan
- one parent snack
- any personal medication that should stay close
A useful rule is simple: if the adult starts running on empty, the child’s bag stops working as well too.
The difference between carry-on and seat-access items
This is the split that makes the carry-on really work. Not everything in the carry-on should be treated as “right now.” Some things are there for the travel day in general. Some things need to be reachable in the next ten minutes without moving around too much or opening every zipper.
A simple split helps:
| Carry-on item | Better place |
| next diaper, next snack, next cup, wipes, one comfort item | seat-access or personal-item zone |
| backup outfit, extra feeding items, overflow snacks, medicine pouch | main carry-on |
| arrival-night extras, overflow supplies | deeper in the carry-on or main luggage |
That difference matters because a well-packed carry-on can still feel useless if the next-use items are not separated from the rest. The bag should support the whole day. The seat-access layer should support the next few minutes.
What to pack in the diaper bag or personal item
The diaper bag or personal item should handle the next two hours, not the whole trip. That is the easiest way to keep it useful. If the carry-on is the bag that gets the family through the travel day, the diaper bag is the bag that solves the next diaper, the next snack, the next spill, the next sudden outfit change, and the next small meltdown without making you open the larger bag.
This is where a lot of parents accidentally make the day harder. They pack the diaper bag like a second suitcase, fill it with backups for backups, and then cannot find the one thing they actually need in the moment. I think this bag works best when it stays small, clear, and built around immediate use.
A simple personal-item framework:
| Category | What belongs here |
| Next diapering round | diaper or pull-up, wipes, changing support |
| Next feeding round | one snack, next bottle or cup, one bib if needed |
| Immediate clothing reset | one emergency outfit |
| Fast comfort support | comfort item, one small distraction |
| Quick cleanup | wipes, dirty-item bag, one cloth |
| Parent basics | phone, wallet, documents, one parent essential |
The next two hours rule makes this bag easier to pack
I use the “next two hours” rule because it keeps the diaper bag honest. If the item will not help in the next two hours, it probably belongs in the main carry-on or suitcase instead. That does not mean the bag has to be tiny. It means it should be focused.
The next two hours usually need support for:
- one diaper or potty problem
- one hunger problem
- one spill or mess
- one rough transition
- one quick clothing reset
That is enough to cover a surprising amount of family travel without turning the personal item into dead weight.
A practical two-hour check:
| Good diaper-bag item | Why it passes the test |
| one diaper or pull-up setup | very likely to matter soon |
| one snack round | easy to use without stopping the whole trip |
| one backup outfit | solves a common emergency fast |
| one comfort item | helps with transitions and overtired moments |
| wipes | useful across several kinds of problems |
Things you need without opening overhead luggage belong here
This is the easiest way to separate the personal item from the main carry-on. If you would be annoyed to wait for the overhead bin, or if you physically may not be able to reach the bigger bag right away, the item belongs in the diaper bag or personal-item zone.
That usually means:
- the next snack, not all the snacks
- the next cup or bottle, not every feeding supply
- one emergency outfit, not all the extra clothes
- wipes and cleanup first, not the full cleanup kit
- one comfort item, not the whole activity system
A simple split looks like this:
| Better in the personal item | Better in the carry-on |
| next diaper setup | extra diaper stock |
| one snack round | the rest of the snack supply |
| one backup outfit | additional extra clothes |
| wipes and one cleanup cloth | larger cleanup pouch |
| comfort item and one small distraction | full activity rotation |
This is one reason the personal item often does more work than the larger bag, even though it holds less.
Emergency outfit should be packed like a full reset, not spare pieces
The emergency outfit is one of the most useful things in this bag, but only if it is packed as a complete change. A random shirt and one extra pair of pants do not help much if the child also needs socks, underwear, or a weather layer and those are somewhere else.
I like treating the emergency outfit as one grab-and-go bundle:
- top
- bottoms
- socks
- underwear or diaper support if relevant
- one light extra layer if the trip calls for it
A quick emergency-outfit view:
| If this happens | The outfit should solve |
| spill or food mess | full clothing reset |
| diaper leak or potty miss | immediate clean change |
| child gets wet or muddy | enough to get comfortable again |
| late arrival and pajamas are not reachable yet | temporary reset until bedtime setup is found |
The point is not to make the personal item heavy. It is to make the one emergency outfit actually usable when it matters.
Comfort item should be easy to grab before everything else
The comfort item earns its place in the personal item because it helps with the exact moments when the larger bag is the hardest to open. That can mean boarding, a long line, a gate delay, a rest stop, a missed nap, or just the point in the day when the child is done with transitions.
For babies, this may be a pacifier or one familiar soothing item. For toddlers and preschoolers, it is often a lovey, small blanket, or one specific toy that helps them settle faster than anything else in the bag.
I only want one main comfort item here:
- the one the child already uses
- the one most likely to work when they are tired
- the one that should never be buried under snacks or spare clothes
A simple comfort-item check:
| Good personal-item comfort item | Why it works |
| familiar and already used at home | more likely to help when the child is stressed |
| small enough to stay close | easy to grab quickly |
| calming, not exciting | helps with regulation instead of adding more stimulation |
Top-tier snack rotation should stay in this bag, not the full snack stash
The personal-item snack setup should hold the best working snacks, not the full food supply. I think of these as the snacks that fix the next problem fastest:
- one easy first snack
- one slower snack that buys time
- one backup that stays closed until it is actually needed
This is the bag for the top-tier snack rotation because these are the snacks you do not want to dig for. They should already be portioned and ready to use.
A simple snack rotation looks like this:
| Snack type | Best job |
| quick snack | takes the edge off waiting or fussiness |
| slower snack | helps with longer stretches and pacing |
| backup snack | saved for the roughest moment later |
The rest of the food can stay in the carry-on. This bag only needs enough to support the next stretch of the day.
Wipes and cleanup access need to be built for speed
Wipes are one of the few items I want to be able to reach almost without looking. The same goes for one dirty-item bag and one quick cleanup cloth. If the personal item is doing its job, the first mess gets handled from this bag without making the situation bigger.
That means the cleanup layer should stay:
- near the top
- together
- easy to restock after it gets used
A fast cleanup setup usually includes:
| Cleanup item | Why it stays in the personal item |
| wipes | solves the widest range of small problems |
| dirty-item or disposal bag | keeps the rest of the bag usable after a mess |
| one cloth | helps when wipes alone are not enough |
This is one of the categories that should feel boring on purpose. If it is simple, it works.
What parents usually bury too deep
This is where the personal item often stops working. The parent packed the right things, but the highest-value items ended up under the less important ones. The most common buried items are:
- the emergency outfit
- the comfort item
- the next snack
- the next diaper setup
- wipes
Those are the items that should be easiest to pull out, not hardest. If I have to move books, chargers, and half the food bag to reach wipes or a clean shirt, the packing order is working against me.
A quick check helps:
| If you need it fast | It should be… |
| next diaper or pull-up | near the top |
| next snack | near the top |
| comfort item | in its own obvious place |
| emergency outfit | packed as one bundle, not loose pieces |
| wipes | reachable in seconds |
That is what makes the personal item useful. It should hold the short-list items that solve the next problem before the bigger bag ever has to open.
Entertainment and activity packing for travel days
This is the part of the packing guide that parents often overdo without meaning to. We panic about boredom, throw in a pile of toys, and end up carrying more than the child will ever use. What tends to work better is a small rotation that fits the trip, the child’s age, and the space they will actually have to play in.
I do not pack entertainment as a giant “fun bag.” I pack it like a support category. The activity setup should help with waiting, sitting, delays, long meals, rest stops, and those hard stretches when the child is tired but not ready to sleep.
A useful activity system usually includes:
- one familiar option
- one quiet hands-on option
- one simple paper-based or book-based option
- one stronger backup for the hardest part of the trip
A simple travel-day activity view:
| Activity type | What it does best |
| Familiar small toy or book | Easy first layer for waiting and transitions |
| Quiet hands-on item | Helps in seats, strollers, restaurants, or long lines |
| Drawing, sticker, or paper item | Good for toddlers and preschoolers who need a simple task |
| Screen backup or strong reserve item | Best saved for the roughest stretch |
Plane-friendly toys should be small, quiet, and easy to manage
Plane toys usually fail for one of three reasons: they are too loud, they have too many pieces, or they become impossible to reset once they fall under the seat. What helps on flights is not novelty by itself. It is low-mess, low-noise, easy-to-hand-over items that work in short bursts.
That means I usually look for:
- one or two familiar toys that do not need much setup
- soft or simple pieces that are easy to recover if dropped
- books or quiet hands-on items that do not overwhelm the seat area
A good flight toy test:
| Good plane toy | Why it works |
| small and quiet | does not create extra stress in a tight space |
| easy to hold in a lap or tray area | works without much room |
| limited number of pieces | easier to reset if dropped |
| interesting for short rounds | better match for travel attention spans |
This is one of the sections where your internal support post on plane activities for a 1-year-old belongs naturally. It helps narrow down what actually earns space in the activity pouch instead of just adding more toys to the bag.
Road-trip activities should be packed for reach, not just variety
Road-trip entertainment works differently because the child is usually strapped in, the parent cannot hand things back endlessly, and the activity has to work without a lot of setup. That is why the car activity bag should be simpler and easier to rotate than parents often expect.
What usually helps most on the road:
- a few seat-friendly activities, not a whole toy basket
- items the child can use with minimal adult help
- activities that can handle short and long stretches
- enough variety to rotate, but not so much that the whole back seat turns into storage
A simple road-trip setup:
| Road-trip activity type | Best use |
| easy hand-held toy | short calm stretches |
| book or quiet look-through item | lower-energy periods |
| simple task or drawing item | older toddlers and preschoolers who need more structure |
| stronger backup option | later in the drive when patience is lower |
Quiet books, sticker books, crayons, and paper work best when they stay limited
Paper-based activities are easy to overpack because they seem light and harmless. Then the family ends up carrying three coloring books, two sticker books, four packs of crayons, and a stack of activity pads that never really get used well. I get much better results when I keep this category tight.
What usually works:
- one quiet book or look-through book
- one sticker or paper activity
- one very small drawing setup
- enough, but not endless variety
A simple paper-activity check:
| Paper-based activity | Why it earns space |
| quiet book | reusable, low mess, simple for waiting time |
| sticker book | gives toddlers and preschoolers a clear task |
| crayons and paper | useful if the child actually enjoys drawing on the go |
| one compact activity pad | good for older preschoolers, but only if it fits the trip |
The trick here is not carrying more. It is keeping one good option fresh for the right moment.
Screen backup plan should be part of the system, not the whole system
I do not treat screens as the problem or the solution. I treat them as one layer in the travel-day activity plan. A screen works best when it is ready, downloaded, and saved for the part of the day when the lighter tools stop doing enough.
That means:
- do the downloads before leaving home
- keep the device charged
- know where it lives in the bag
- save it for the harder stretch instead of using it immediately
A practical screen plan:
| Screen timing | When it usually works best |
| not first out of the bag | keeps stronger backup tools in reserve |
| after simpler activities fade | good for the middle or late rough patch |
| during long waits or in-seat stretches | useful when movement is limited |
| with a clear end point if possible | keeps the screen from becoming the whole plan |
The point is not to avoid screens. It is to make sure they help the day instead of replacing the whole activity system too early.
Rotating activities instead of overpacking toys usually works better
This is the shift that makes the whole activity bag lighter. Most kids do not need more toys on a trip. They need better timing. When the whole activity stash comes out at once, it loses value fast. The stronger approach is to hold things back and use them in short rounds.
What I usually want is:
- one easy first item
- one second item for the middle stretch
- one stronger backup for later
- one activity that stays hidden until the harder part of the day
That gives the bag more staying power without making it bigger.
A simple rotation plan:
| Activity round | What to use |
| First stretch | familiar, low-effort item |
| Middle stretch | quieter hands-on or paper-based option |
| Later hard stretch | stronger backup item or screen |
| Final reserve | one hidden activity that has not already been used |
Overpacking toys usually creates two problems. The bag gets heavier, and the child burns through the whole activity plan too early. Rotation fixes both. It keeps the bag smaller and makes each item feel newer when it comes out.
That is usually what makes the activity system work: not more stuff, just better pacing.
Car seats, strollers, carriers, and big gear
Big gear is where family packing starts feeling expensive, physical, and annoying all at once. It is also where a lot of overpacking happens. Parents worry about being stuck without the stroller, the wrong car seat, or the carrier they decided not to bring, so they end up hauling everything. What usually works better is being more specific: which piece of gear solves the real problem on this trip, and which piece just adds bulk.
That is how I think about this section. Not “what is the best stroller” or “what gear do families use.” The better question is what the trip actually asks for. A road trip, an airport day, a city weekend, and an outdoor trip will not use the same setup well.
A simple big-gear filter:
| Gear type | Best question to ask first |
| Stroller | Will this make more parts of the day easier than harder? |
| Carrier | Will I need hands-free movement in places a stroller is awkward? |
| Car seat | Will I truly need my own, and can I manage it through the trip? |
| Extra gear | Does this solve a real problem I am likely to have? |
When to bring a stroller
A stroller earns its place when it solves more than one problem. It is not just for carrying the child. On the right trip, it also buys rest, holds part of the load, helps with long walks, and gives a tired toddler a place to reset before the day turns rough. On the wrong trip, it becomes one more bulky thing to lift, fold, store, and drag through places where it does not move well.
I usually bring a stroller when the trip includes:
- long airport or walking days
- city outings with enough flat ground to make it worthwhile
- a child who still naps or rests better with motion
- a day structure where carrying the child the whole time would wear everyone out
I usually think twice when the trip includes:
- rough outdoor ground
- a lot of stairs
- tight public transport
- short outings where the stroller will be folded more than used
A quick stroller check:
| Bring the stroller when… | Reconsider it when… |
| the child will likely need breaks from walking | it will be folded and carried most of the day |
| the day includes a lot of distance | the trip is built around very short transitions |
| it also helps carry part of the family load | it adds more hassle than relief |
When to bring a carrier
A carrier usually works best when movement matters more than storage. It is useful in airports, transit-heavy city trips, crowded places, and outdoor settings where a stroller is more trouble than help. It also works well when a child still needs closeness and settling support but the adult needs both hands free.
For babies, this is often one of the most useful travel items in the whole gear list. For toddlers, it depends more on age, size, and how realistic it is for the adult to carry them for meaningful stretches. Some trips make the carrier a backup. Some make it the main mobility tool.
I usually pack the carrier when:
- there will be stairs, crowded lines, or rough ground
- the stroller is likely to slow the family down
- the child still settles well in it
- the adult carrying the child can realistically use it for the trip
A simple carrier view:
| Carrier helps most when… | Carrier helps less when… |
| the trip has lots of transitions and awkward walking setups | the child is unlikely to tolerate it for long |
| the adult wants hands-free movement | the trip already has an easier stroller setup |
| the ground or route is stroller-unfriendly | the child’s size makes long use unrealistic |
This is one of the reasons outdoor trips need their own thinking. A carrier that barely gets used on a hotel trip can make an outdoor day much easier.
Travel car seats need to match the trip, not just the child
Car seats are where a lot of packing decisions become pure trade-offs. Yes, the child may need the seat. The real question is whether bringing your own seat makes this trip smoother or harder overall. Sometimes the answer is obvious. Sometimes it depends on how many transitions the family has to manage, whether they are flying, whether rideshares are part of the plan, and how much gear the adults can realistically move at once.
This is the section where the support content in your category really matters. If the main issue is choosing a seat that works for air travel,airline-approved car seats is the right next read. If the bigger question is how the seat fits into local transport after arrival, how to get an Uber with a car seat belongs right in this decision.
A useful car-seat decision check:
| Bring your own car seat when… | Think twice when… |
| you know you will need it repeatedly on the trip | the seat will be very hard to move and rarely used |
| the child does best in a familiar setup | the trip has too many transitions for the bulk to make sense |
| safety and consistency matter more than convenience | you still have not worked out how it will move through the travel day |
Gate-check decisions should be made before the airport, not at the gate
A lot of gear stress comes from waiting too long to decide what is actually traveling with the child and what is just helping you get through the airport. A stroller may be useful all the way to the gate and completely unnecessary once you board. A bulky item may feel worth bringing until you picture folding it in a crowded boarding line while also holding a child and a diaper bag.
That is why I like making the gate-check decision early. I want to know:
- whether the gear is mainly for the airport
- whether the child will need it right up to boarding
- whether it will create more stress once the boarding process starts
A useful gate-check filter:
| Gear item | Gate-check usually makes sense when… |
| Stroller | it helps with long walks and waiting, but not during the flight |
| Car seat | it is not being used on the plane and is too awkward to keep with you |
| Bulky extra item | it solves the airport part of the day better than the in-seat part |
The point is not to bring less by default. It is to be honest about when the item stops helping.
Rental gear vs bringing your own depends on trust, hassle, and how often you will need it
This is usually not a simple yes-or-no decision. Bringing your own gear gives you familiarity and control. Renting or borrowing gear can make the travel day lighter. The better option depends on what the child truly needs and how much confidence you have in what will be waiting at the destination.
I usually think through three questions:
- Will my child actually do better with our own gear?
- How hard will it be to move this gear through the trip?
- If we do not bring it, how confident are we in what we are getting instead?
A simple comparison helps:
| Option | Usually better when… | Usually worse when… |
| Bring your own | familiarity matters, safety questions matter, item will be used often | the gear is bulky and only solves a small part of the trip |
| Rent or borrow | the item is large, used rarely, or easy to trust at the destination | the quality is uncertain or the child depends on the exact setup |
This is one of those choices where the right answer often comes from the trip, not the item itself.
Mobility vs bulk is the trade-off behind almost every big-gear choice
This is really what the whole section comes down to. Big gear always gives you something and costs you something. A stroller may buy rest and storage but cost you speed and flexibility. A carrier may buy mobility but cost the adult comfort over a long day. A car seat may buy consistency and safety confidence but cost you a lot of effort getting through the travel day.
That is why I usually think in terms of what the family needs more on this trip:
- more mobility
- more rest support
- more storage help
- more predictability
- less to carry
A final trade-off check:
| If your trip needs more… | You may lean toward… |
| walking flexibility | carrier or lighter setup |
| child rest and gear support | stroller |
| transport consistency | bringing your own car seat |
| easier transitions and less hauling | fewer large items overall |
For most families, the best gear setup is not the one with every option covered. It is the one that solves the most likely problems without turning the adults into baggage handlers for the whole trip.
Packing for flights with babies and toddlers
Flight packing is different from general trip packing because the day stays “live” for much longer. On a road trip, you can often reach into the car or stop and reset. On a flight day, a lot more has to work without that kind of flexibility. The airport, the security line, the gate, boarding, takeoff, delays, and the first stretch after landing all put pressure on the same small group of items.
That is why I pack flights in layers. There is the full carry-on, which supports the whole travel day. Then there is the smaller access layer, which supports the next part of the day without making me open everything. Flight packing works best when those two layers are very clear.
A simple flight-packing split:
| Flight-packing layer | What it should do |
| Carry-on | Cover the full airport-to-arrival window |
| Personal item or diaper bag | Cover the next one to two hours |
| Seat-access layer | Cover takeoff, delays, snack timing, and the first stretch after boarding |
The FAA’s child-restraint guidance also affects how some families pack for flights, especially if they are bringing a car seat on board. That changes what needs to stay accessible and what can stay stored until later. (faa.gov)
What needs to stay accessible on a flight day
The biggest mistake on flight days is packing the right items in the wrong layer. A family can be fully prepared and still have a rough airport if the next diaper, the next snack, the comfort item, and the backup outfit are all packed too deep.
For flights, the most useful items are usually the ones that solve immediate problems:
- one diaper or pull-up setup
- wipes
- one snack round
- one cup or bottle setup
- one backup outfit
- one comfort item
- one simple activity
- medicine that might matter before arrival
A practical access view:
| Keep accessible on flight day | Can stay deeper in the carry-on |
| next snack | overflow snacks |
| next diaper setup | extra diaper stock |
| comfort item | backup toys |
| one spare outfit | additional extra clothes |
| wipes and quick cleanup | larger cleanup kit |
This is also where the flight-paperwork side can still matter. If the family is traveling with a lap infant, the document setup should be in the easy-access layer too, not buried in the main bag. That is where what documents do kids need to fly fits naturally into the packing process.
Airport-specific items should be packed for movement, waiting, and small resets
Airport packing is not just about what happens on the plane. A lot of the hardest parts of the day happen before boarding. Families need things that work in lines, at the gate, in restrooms, and during long waits when kids are getting tired before the flight even starts.
Airport-specific items usually include:
- documents and adult ID
- feeding items that can get through the airport stage cleanly
- a quick cleanup layer
- one activity that works while waiting
- stroller or carrier support if the trip needs it
- a reset snack for the gate instead of the whole food supply
A simple airport-use view:
| Airport moment | Item that usually matters most |
| check-in and security | documents and feeding setup |
| long line or wait | small snack and one activity |
| bathroom stop or diaper reset | wipes and changing setup |
| tired child before boarding | comfort item and movement-friendly setup |
What helps here is not a bigger bag. It is a clearer one.
Plane sleep setup should be packed for the child you have, not the ideal flight you hope for
Sleep on a plane usually works best when the setup is small, familiar, and easy to pull into place without turning the whole row upside down. I do not pack for perfect sleep in the air. I pack for a better chance of rest. That means focusing on the few sleep items that are most likely to matter:
- the child’s usual sleep clothing if it helps
- one comfort item that already works at home
- one layer for temperature changes
- any simple support that makes seat-time sleep more realistic
A practical plane-sleep view:
| Sleep support | Why it earns space on a flight |
| familiar sleep clothing | helps the child feel like rest is expected |
| comfort item | supports naps and overtired stretches |
| one light layer | solves cold cabins and changing temperatures |
| very small sleep setup | easier to use in a tight seat space |
This is one of the sections where how to make a bed on a plane fits naturally. It helps parents narrow down what a realistic in-seat sleep setup actually looks like, especially on longer flights.
Extra delays and backup items matter more on flights than on most other trips
Flights need more margin because the delay points stack. A late gate change, a slow boarding process, a longer-than-expected taxi, a missed meal, or baggage delays after landing can all stretch the day without giving families many easy ways to reset. That is why flight packing usually needs a little more backup than a similar-length road trip.
The backup layer does not have to be huge. It just needs to cover the common ways flights run long:
- one more snack than you think you need
- one more diaper or pull-up than the planned timing suggests
- one more clothing reset than feels strictly necessary
- one extra feeding round if the child still uses bottles
- one stronger comfort or activity option saved for late in the day
A useful delay buffer:
| Delay problem | Best backup item |
| boarding or gate delay | extra snack round |
| long taxi or late takeoff | one more drink or comfort layer |
| missed meal timing | more filling backup food |
| travel day running into bedtime | one extra comfort or sleep-support item |
This is what makes flight packing feel heavier than general trip packing. It is not just the plane. It is the amount of the day you have to support before the suitcase becomes useful again.
Flights usually need more immediate-access packing than road trips
This is the main difference between the two. On a road trip, families often have more chances to stop, reach into the car, or grab something from another bag. On a flight, once the wrong item is packed too deep, it can stay hard to reach for a long time. That is why immediate-access packing matters more in the airport and in the seat than it usually does on the road.
A quick comparison:
| Travel type | What immediate-access packing usually needs to do |
| Flight | support long stretches without easy resets |
| Road trip | support the next stretch, but with more chances to stop and reorganize |
That difference is what drives the whole flight-packing system:
- more items in the carry-on
- tighter personal-item setup
- clearer seat-access layer
- fewer assumptions that you can “just grab it later”
When families understand that difference, they usually pack flights much better. The list gets more useful, the bag layout gets cleaner, and the travel day stops depending so heavily on luck.
Packing for road trips with young kids
Road-trip packing works differently from flight packing because the family usually has more space but less structure. That can be helpful or it can turn into a mess fast. A car lets you bring more, but “somewhere in the car” is not the same thing as having the right item when you need it. What makes a road trip easier is not just bringing supplies. It is knowing what stays up front, what stays near the child, and what stays packed until the next stop or overnight.
That is why I treat a road trip packing list for kids as a car-organization system, not just a checklist. The car needs to support hunger, boredom, mess, diapering or potty breaks, and that hard stretch at the end of the day when everyone is tired and still not there yet.
A simple road-trip setup looks like this:
| Road-trip zone | What it should cover |
| Front-seat or parent zone | wipes, medicine, backup snacks, tissues, emergency cleanup |
| Kid-access zone | cup, snack round, small activity, comfort item |
| Rest-stop or quick-stop bag | diapering, potty items, one spare outfit, cleanup kit |
| Overnight-access bag | pajamas, toothbrushes, one next-day outfit, bedtime basics |
Snack boxes work better than one giant food bag
Snacks are one of the few things that can improve a road trip almost immediately, but only if they are packed in a way that makes sense. One big grocery bag full of food usually becomes hard to manage. Parents end up handing back random snacks too early, kids eat the most exciting options first, and the useful food is harder to find later in the drive.
Snack boxes or a simple snack rotation work better because they create structure. They let you pace the day instead of reacting every time someone says they are hungry.
A useful snack setup usually includes:
- one easy early snack
- one slower snack for the longer stretch
- one more filling option
- one backup that stays untouched until later
A simple road-snack system:
| Snack type | Best use in the car |
| quick snack | takes the edge off early waiting or loading time |
| slower snack | helps with the middle stretch of the drive |
| filling snack | covers a delayed stop or missed meal |
| backup snack | saved for traffic, late arrival, or a rough patch |
Rest-stop supplies should be packed like a quick-reset kit
A rest stop is usually not the moment to search through the whole car. If the child needs a diaper change, a potty try, clean clothes, or a quick cleanup, those items should already be grouped together in one bag or one pouch that can leave the car in seconds.
That quick-stop kit usually does more work than parents expect because it covers the part of the trip where kids are out of the seat, tired, hungry, and more likely to need a reset before getting back in.
A practical quick-stop kit usually includes:
| Quick-stop item | Why it matters |
| diaper or pull-up setup | solves the most immediate stop need fast |
| wipes and cleanup cloth | handles diapering, sticky hands, and random mess |
| one spare outfit | makes accidents easier to recover from |
| small snack or drink | helps smooth the return to the car |
| dirty-item bag | keeps the rest of the car setup usable |
The point of this bag is speed. If it takes too long to grab and use, it is not really a quick-stop kit.
Seat-back activities should be packed for independence and easy rotation
Road-trip activities work best when the child can use them with only a little help. Parents cannot keep turning around, passing back toys, or rebuilding complicated activity setups while driving. That is why the best seat-back activities are usually simple, contained, and easy to swap out at stops.
I usually want a road-trip activity setup to do three things:
- keep the child busy in short rounds
- avoid a lot of loose pieces
- stay easy to rotate without turning the whole back seat into storage
A good seat-back activity setup:
| Activity type | Why it works in the car |
| small hand-held toy | easy to use during shorter calm stretches |
| look-through book or quiet book | good for slower parts of the drive |
| paper or sticker activity | useful for older toddlers and preschoolers |
| one stronger backup activity | saved for the hard stretch later |
This is where road-trip packing is different from flight packing. In the car, the best activity is often the one the child can manage on their own for a while without needing the parent to keep resetting it.
Car organization matters more than how much space the car has
A lot of road trips feel disorganized even when the family packed plenty. The issue usually is not volume. It is placement. A big car can still be a hard travel setup if the wipes are in the trunk, the snack box is under a suitcase, and the overnight bag is buried behind three other bags.
That is why I think of road-trip packing as zones, not just bags. The more clearly the car is divided by use, the less often parents have to stop, dig, reshuffle, and lose patience just trying to find what they already packed.
A simple car-organization layout:
| Car zone | What should live there |
| Driver or front-seat zone | emergency wipes, tissues, parent water, backup snacks, medicine pouch |
| Child zone | cup, comfort item, one or two activities, current snack round |
| Quick-stop zone | diapering or potty kit, cleanup bag, spare outfit |
| Overnight-access zone | pajamas, bedtime basics, one next-day outfit |
| Bulk-storage zone | extra clothes, overflow diapers, rest of the trip supplies |
This is also where the road-trip category starts supporting the rest of the packing system. If the zones are clear, the family can move through a long day without unpacking half the car at every stop.
Motion or mess management should be packed like part of the travel system, not as an afterthought
Road trips are messy in very specific ways. Crumbs pile up. Drinks tip. Wet shoes end up on clean clothes. A child gets car sick, or nearly does. Someone drops a snack under the seat and now the whole row feels dirty. These are not unusual travel-day problems. They are common enough that I like treating mess and motion support as part of the core road-trip setup.
That usually means having:
- wipes and cleanup cloths that are easy to reach
- one dirty-item or disposal bag close by
- one clothing reset that can handle a bigger mess fast
- one small pouch for the things you would want first if the child suddenly feels unwell
A practical road-trip mess plan:
| Road-trip problem | Packed item that helps most |
| food or drink spill | wipes, cloth, spare shirt or outfit |
| sticky hands and seats | wipes near the child zone |
| wet or dirty items in the car | dirty-item bag or separate pouch |
| child feeling unwell in the seat | quick-access cleanup and clothing reset |
What matters most is not how many cleanup items the family owns. It is whether the right few are packed where they can actually help.
Overnight access should work without unpacking half the car
This is one of the biggest road-trip wins. If the family is stopping for the night, the car should not have to be fully unpacked just to get everyone cleaned up, changed, and into bed. A lot of road-trip frustration disappears when the first-night items are already grouped together before the drive starts.
I like having one overnight bag or overnight-access section that covers:
- pajamas
- toothbrushes and simple wash-up items
- one next-day outfit per child
- diapering or potty basics
- comfort item and bedtime support
A useful overnight setup:
| First-night need | What should already be grouped together |
| bedtime routine | pajamas, wash-up basics, comfort item |
| diapering or potty reset | the same quick-use items the family would want at a rest stop |
| next-morning ease | one outfit per child |
| late arrival with tired kids | a bag that can leave the car in one trip |
This is one of those packing steps that feels a little extra at home and then feels completely worth it the first time you arrive tired, in the dark, with kids who are done with the day.
Outdoor, hiking, and camping packing with toddlers
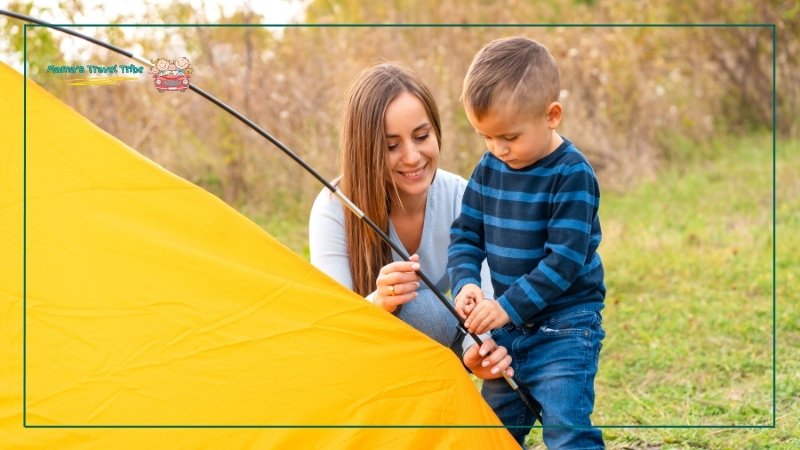
Outdoor trips make packing feel different because the day is usually less controlled. Kids get wetter, dirtier, hungrier, and more tired in ways that show up fast. That does not mean you need a giant gear pile. It means the outdoor version of your packing list has to work harder in a few specific categories: layers, weather protection, backup clothes, cleanup, and the comfort items that keep the day from going off the rails late.
I think of outdoor packing as a “reset-friendly” version of the normal family system. The basics stay the same, but the margin gets more important. If a toddler is cold, soaked, muddy, or overtired and the fix is buried in the wrong bag, the whole outing can feel much harder than it needed to be.
A simple outdoor-packing view:
| Outdoor category | What it needs to handle |
| Clothing | movement, dirt, damp ground, temperature changes |
| Protection | sun, wind, weather, and long stretches outside |
| Cleanup | mud, wet items, sticky hands, snack mess |
| Comfort | tired kids, outdoor naps, late-day transitions |
Layering works better outdoors than packing one heavier outfit
This is one of the biggest differences between outdoor packing and regular vacation packing. The weather outside shifts more, the child’s activity level changes more, and the trip usually includes more stop-and-go movement. A toddler who starts the morning cold can be sweaty by lunchtime and chilly again once they stop moving. That is why layers usually work better than one thick outfit.
The National Park Service gives very similar guidance for hiking with children. It recommends water, snacks, sunscreen, and appropriate footwear and clothing, which is another way of saying that outdoor comfort is usually about flexible basics rather than one perfect outfit.
A practical layering setup usually includes:
- a base outfit that is easy to move in
- one easy extra layer
- one outer layer if the forecast calls for it
- extra socks if the day could get damp or dirty
A simple layering check:
| Layer | What it does outdoors |
| Base layer | keeps the child comfortable while moving |
| Mid layer | adds warmth without a full outfit change |
| Outer layer | handles wind, light rain, or cooler stretches |
| Extra socks | fixes the “everything is fine except the feet are wet” problem fast |
Sun and weather protection should solve the real conditions, not every possible forecast
Outdoor packing gets bulky when families try to cover every season at once. I get better results when I ask a narrower question: what is the weather most likely to do, and what would make the child uncomfortable first? Most of the time, the answer is some mix of sun, wind, damp ground, or a temperature swing late in the day.
That is where the protection pieces earn their place:
- a hat that the child will actually keep on
- one outer layer that can handle wind or light weather changes
- sunscreen if the trip will include longer outdoor stretches
- one simple shade or cover strategy for babies if relevant
HealthyChildren’s sun-safety guidance lines up with this approach. It emphasizes shade, protective clothing, hats, and sunscreen as the basics for keeping children more comfortable outdoors.
A useful outdoor protection check:
| Outdoor condition | What usually matters most |
| strong sun | hat, lighter protective clothing, sunscreen |
| breezy or cooler weather | one good outer layer |
| changing conditions through the day | layers that can be added or removed quickly |
| longer outdoor outings | protection that still works after snacks, play, and rest stops |
Backup clothes matter more outdoors because the mess is usually bigger
Outdoor mess is different from indoor mess. It is not just food or a spilled drink. It is mud, damp knees, wet socks, dirty sleeves, and the kind of full-body grime that can make a child much harder to settle once they are tired. That is why outdoor trips usually need stronger backup clothing than a simple day out around town.
I like thinking of outdoor backups as reset clothes, not just extras:
- one full outfit change that can handle a wet or dirty child
- extra socks
- one layer that can go on after the child changes
- a bag to separate the dirty clothes from the rest
A practical backup-clothes view:
| Outdoor mess | Backup item that usually helps most |
| muddy legs or wet bottoms | full outfit change |
| wet shoes or damp ground | extra socks |
| late-day chill after play | dry layer |
| dirty clothes still in the bag | separate dirty-clothes or wet-items bag |
This is also where camping activities for toddlers fits naturally into the category. Once a family is packing for outdoor time, the next question is often not just what clothing to bring, but what kind of simple outdoor setup actually keeps the child busy without making the bag heavier than it needs to be.
Outdoor cleanup needs its own small system
Outdoor mess gets bigger faster than indoor mess. Dirt, damp socks, sticky hands, wet knees, muddy cuffs, spilled snacks on a picnic blanket, and the child who sits in the only puddle in the whole park all ask for a different kind of cleanup than a normal day out. That is why I like having one outdoor cleanup setup instead of hoping the regular diaper bag wipes can cover everything.
A useful outdoor cleanup kit usually includes:
- wipes
- one sturdier cloth
- a dirty-clothes or wet-items bag
- one quick clothing reset
- hand-cleaning support that works before meals and snacks
A simple outdoor cleanup view:
| Outdoor cleanup problem | Item that usually fixes it fastest |
| muddy hands and face | wipes or hand-cleaning support |
| wet or dirty clothes | separate dirty-items bag |
| bigger mess on legs, shoes, or gear | cleanup cloth |
| child needs a full reset before leaving | spare outfit and dry socks |
What helps most is keeping this as a working kit, not scattering the pieces across different bags.
Toddler-safe snacks outdoors need to be easy to carry, easy to eat, and easy to clean up
Outdoor snacks do more work than just filling hunger. They help with pacing, rest breaks, mood, and those points in the day when the child is still having fun but starting to slide. I pack these differently from home snacks because the setting is different. Wind, dirt, wet hands, and no easy place to wash up all change what is actually useful.
The best outdoor snacks usually have three things in common:
- they travel well
- they do not fall apart instantly
- they are familiar enough that the child will actually eat them
A practical outdoor snack setup:
| Outdoor snack type | Why it works better outside |
| simple familiar snack | easier to hand over without negotiation |
| slower snack | buys a little more time during breaks |
| more filling backup snack | helps late in the outing when energy drops |
| low-mess option | keeps cleanup lower when the child is tired |
I usually avoid building this around ideal picnic meals unless the outing really supports that. Simple almost always works better outdoors.
Sleep and comfort outdoors need more thought than parents expect
Outdoor trips can go really well all day and still fall apart at the tired part if the sleep and comfort side is weak. That is why I think about outdoor comfort in two parts:
- what helps the child rest during the day
- what helps them settle once they are done
For some families, that means a stroller nap setup. For others, it means carrier support, a comfort item, pajamas that can go on quickly, or just one familiar layer that makes the evening feel less rough.
A simple outdoor comfort check:
| Late-day problem | What usually helps most |
| tired child who still has to move | carrier, stroller, or easier transport support |
| cold after active play | dry layer or extra socks |
| child is done but not home yet | comfort item and snack backup |
| bedtime after a very full day | familiar sleep clothing and easiest possible routine |
This is where outdoor packing starts overlapping with the broader trip system. The day may be outside, but the evening still needs the same sleep and comfort basics the child depends on anywhere else.
Mobility gear choices should match the ground and the child
Outdoor gear decisions usually come down to one question: what will actually move well here? A stroller that works perfectly in an airport may be annoying on rough ground. A carrier that feels great for short stretches may become a lot on a long outing. The right choice depends on the route, the child’s size, and how much the adult can reasonably carry.
I usually think about it this way:
| If the outing has more… | You may want more of… |
| smooth paths and longer distance | stroller support |
| rough ground, steps, or uneven terrain | carrier support |
| long active stretches with few breaks | lighter setup overall |
| a child who tires quickly late in the day | whichever option gives the best reset |
What not to pack when traveling with kids
Packing with kids gets harder when every “just in case” item makes it into the bag. Most families do not struggle because they forgot everything. They struggle because the bags got heavy, the useful items got buried, and too much of the packing was built around fear instead of the actual trip.
This section matters because overpacking has a real cost. It slows down airport movement, makes road-trip stops messier, turns hotel arrivals into full unpacking sessions, and makes it harder to find the things that actually matter when a child needs help right away. A good family travel packing list is not the longest one. It is the one that solves the most likely problems without making the family carry a whole extra layer of stress.
A simple filter helps:
| If the item does this | It probably does not need to come |
| solves a problem you are very unlikely to have | probably leave it |
| duplicates something already packed in a useful way | probably leave it |
| creates bulk without being easy to use | probably leave it |
| can be bought easily on arrival if needed | probably leave it |
| only seems necessary because the whole list feels uncertain | probably leave it |
Duplicates you rarely need are some of the easiest things to cut
This is one of the fastest ways bags get bloated. Parents pack three versions of the same solution because each one feels small on its own. Three extra cups, two extra blankets, multiple backup toys, too many bibs, extra shoes “just in case,” and a pile of hygiene items that all do the same basic job. None of it looks like too much when you hold it one item at a time. It looks very different when it all ends up in the same bag.
What usually helps more is choosing one strong version of each category and then keeping one sensible backup only where it matters.
A simple duplicate check:
| Category | What is usually enough |
| cups or bottles | the working set plus a small backup |
| comfort items | the main one, maybe one backup if it truly matters |
| activity items | a small rotation, not several versions of the same toy |
| cleanup cloths | enough to stay usable, not a full stack |
| shoes | the pair that fits the trip plus one clear second pair only if needed |
The goal is not to pack the bare minimum. It is to stop carrying extra versions of the same solution when one would have done the job.
Bulky items that create more stress than help should usually stay home
Some items look helpful until the trip starts. Then they become one more thing to carry, fold, store, clean, or work around. Big gear is the most obvious example, but this also shows up in clothing, toys, feeding gear, and sleep extras. The real question is not “Could this help?” It is “Will this help enough to justify the space and effort?”
That means I am usually cautious with:
- large items that only solve one small problem
- big comfort extras that are not truly needed
- oversized toy or activity setups
- feeding gear that turns one meal into a full production
- anything that makes transitions slower without offering much relief
A practical bulk check:
| Bulky item type | Better question to ask |
| extra gear | will this be used often enough to earn the space? |
| oversized toy or comfort item | does the child really depend on this one? |
| large feeding setup | is this solving a real travel problem or just copying home? |
| extra clothing volume | is this replacing a better laundry or reset plan? |
If the item only helps in a very narrow situation and makes every other part of the trip harder, it is often better left behind.
Too many toys usually make travel harder, not easier
This is one of the easiest traps in family packing. Parents worry about boredom, so they add toy after toy. Then the bag gets heavier, the child sees everything at once, and the activity setup burns out early because nothing feels new for long. More toys usually do not create more calm. Better pacing does.
What tends to work better is:
- one familiar item
- one quiet hands-on activity
- one book or paper-based option
- one stronger backup for later
A simple toy check:
| If the toy… | Better call |
| is noisy, bulky, or has too many pieces | leave it |
| only holds attention for a minute and makes a bigger mess after | leave it |
| works well in short rounds and packs small | keep it |
| adds variety without adding clutter | keep it |
For most trips, the lighter activity bag is the better one. Kids usually do not need a toy store in transit. They need a few things used at the right time.
Too many outfit changes for short trips usually add bulk without solving much
Short trips are where clothing overpacking shows up fastest. Parents pack as if every child will need three full outfit changes a day, and then most of those clothes come home untouched. I still want margin with kids, but I want useful margin. One real backup outfit does more work than four extra “just in case” looks stuffed into the bag.
What helps is packing around the child’s actual mess level, not the maximum possible chaos of parent imagination.
A simple short-trip clothing check:
| Trip length | Usually enough |
| day trip | one emergency outfit |
| one night | one main outfit per day plus a little margin |
| short weekend | one outfit per day, a few real backups, not endless extras |
The key is remembering what the extra clothes are for. They are there to recover from mess, not to create a whole second wardrobe for a 36-hour trip.
Some items are easier to buy on arrival than drag through the whole trip
Not everything has to leave home with you. A lot of families pack as if the destination has nothing. Sometimes that is true, especially with medicine, comfort items, or a very specific formula or diaper brand. A lot of the time, it is not. The smartest packing systems leave room for the things that are hard to replace and stay lighter on the things that are easy to restock.
Items that are often easier to buy after arrival:
- extra snacks
- extra wipes if you already packed enough for the travel day
- overflow diapers if the destination makes that realistic
- basic toiletries
- extra bottled water or simple kid drinks
Items I usually would not plan to replace casually:
- medicine
- favorite comfort items
- passports and travel documents
- the one bottle or cup setup that already works well
- the exact sleep item the child depends on
A quick arrival-buy filter:
| Pack it from home when… | Buy it on arrival when… |
| the child depends on that exact item | a basic version will do |
| it would be stressful to search for it late | stores are easy to reach |
| it matters on the travel day itself | it only matters after the family settles in |
| it is part of sleep, health, or documents | it is a replaceable day-to-day supply |
This is one of the easiest ways to keep longer-trip bags under control without underpacking the important categories.
Why overpacking makes family travel harder
Overpacking does not just make the bag heavier. It makes the whole trip slower. It makes it harder to find the useful items, harder to move through airports and hotel arrivals, harder to repack during the trip, and harder to keep the car or room from turning into a dump zone. With kids, that clutter cost adds up quickly because the day already has enough moving parts without extra gear getting in the way.
That is why I think of overpacking as a travel-day problem, not just a suitcase problem.
A simple overpacking reality check:
| Overpacking effect | What it usually causes |
| heavier bags | more fatigue and slower transitions |
| too many categories mixed together | harder to find the useful items |
| too many backups | the real essentials get buried |
| more gear than the trip supports | extra stress during movement, check-in, and arrival |
The best family packing usually sits in the middle. Not bare minimum. Not every possible backup. Just enough to solve the most likely problems, with enough margin that one hard stretch does not throw off the whole trip.
The most common family packing mistakes
Most family packing mistakes do not start with forgetting everything. They start with one weak part of the system. The clothes are packed, but nothing clean is easy to reach. The snacks are packed, but there is no real backup once the first round is gone.
The medicine made it into a bag, but not the bag that will actually be with the family when it matters. That is why these mistakes keep showing up. They are not usually about effort. They are about placement, timing, and packing for the ideal version of the trip instead of the real one.
What I notice most often is that parents work hard and still end up with a setup that makes the day harder than it needs to be. The good news is that these mistakes are usually fixable without buying anything new. Most of them come down to how the packing is organized.
A quick mistake check:
| Packing mistake | What it usually causes |
| Packing everything in one bag | The useful items get buried |
| No spare clothes within reach | Small messes turn into bigger travel-day problems |
| Forgetting medicine | Minor issues become stressful fast |
| No snack backup | Delays and long transitions get harder than they need to be |
| Ignoring sleep setup | The first night and naps go off course faster |
| Packing for ideal conditions only | The whole system feels fragile the moment the day shifts |
Packing everything in one bag makes the right items harder to use
This is probably the most common mistake because it feels organized at home. One bag sounds simple. In real travel, it usually means the diapering items, snacks, pajamas, health kit, and backup outfit are all technically packed but mixed together in ways that make them harder to reach. The moment a child needs something quickly, the whole family ends up searching through the bag instead of solving the problem.
That is why the packing system matters so much more than the suitcase itself. One-bag packing usually fails families because kids do not need one kind of support. They need several kinds, often within the same hour.
A one-bag problem usually looks like this:
| What is packed | What goes wrong |
| Spare clothes | Buried under destination clothes |
| Wipes and snacks | Packed together with items not needed until arrival |
| Medicine | Hard to find in a larger mixed bag |
| Bedtime items | Lost in the middle of the suitcase on arrival night |
The better fix is not always “more bags.” It is clearer job separation between the bags and pouches you already have.
No spare clothes within reach is one of the fastest ways to make the day harder
Parents often pack spare clothes correctly for the trip and incorrectly for the travel day. The child has extras, but those extras are in checked luggage, in the trunk, or too deep in the main bag to help when the spill, leak, or accident actually happens. That is what makes this mistake so frustrating. You did pack the clothes. They just cannot do their job when the day needs them.
A good spare-clothes setup usually means:
- one full reset outfit in the immediate-access layer
- at least one more backup in the main travel bag if the day is long
- the rest packed for the destination
A simple spare-clothes check:
| If this happens | The backup outfit should be… |
| spill or food mess | easy to reach right away |
| diaper leak or potty accident | complete, not random loose pieces |
| wet or muddy child | packed with socks or any needed extra layer |
This is one of those mistakes that feels small until the first outfit change is needed in a place where you really do not want to start unpacking everything.
Forgetting medicine usually feels worse than forgetting almost anything else
Clothing can be washed. Snacks can often be bought. A toy can be skipped. Medicine is different. If the child needs it and it is not there, the whole trip can feel fragile very quickly. That is why I think forgetting medicine is less about the item and more about the planning gap behind it.
The most common version of this mistake is not forgetting all health items. It is forgetting the one that matters most:
- the daily medication
- the fever or pain relief
- the dosing tool
- the thermometer
- the item the parent always uses at home and assumes they will remember later
A useful medicine check:
| Medicine mistake | Why it causes so much trouble |
| left at home completely | the family has no immediate fix |
| packed in the wrong bag | the medicine exists but is not usable when needed |
| packed without the tool or instructions | makes a tired moment harder to manage |
| packed as an afterthought | more likely to be forgotten or misplaced |
This is one category where being repetitive in your system actually helps. The health pouch should always live in the same kind of place so it does not turn into a last-minute guess.
No snack backup makes delays feel much longer than they are
A lot of travel-day food problems happen because the family packed enough snacks for the normal plan and nothing for the version where the day runs late. Kids do not care that the restaurant stop is ten minutes farther than expected or that the gate delay keeps stretching. If the first snack round is gone and there is nothing left with a little staying power, the whole mood of the day can drop fast.
That is why I always want one snack that is not for the first stretch. It is for the rough stretch. The one when the child is tired, the timing is off, and everyone needs a little more margin than they thought they would.
A practical snack-backup check:
| If the day does this | The snack backup should solve |
| travel runs long | one more round of food without scrambling |
| meal timing slips | enough to bridge the gap without a meltdown |
| child gets tired and hungry together | something familiar and easy to hand over |
| the first snack stash is already gone | a real reserve, not random leftovers |
The easiest mistake is using all the best snacks too early. The easiest fix is packing one snack round that stays untouched until it is actually needed.
Ignoring sleep setup usually makes the first night harder than it should be
Parents often remember pajamas and forget the rest of what helps their child sleep. Then the family arrives tired, the room is unfamiliar, and bedtime turns into a scramble because the useful sleep items are either missing or packed too deep. That is why sleep setup belongs on the mistake list. A weak sleep setup can make the rest of the trip feel harder starting on night one.
The problem is usually not that parents forgot everything. It is that they packed sleep like clothing instead of treating it like a real category.
A weak sleep setup often means:
- pajamas are packed but the comfort item is buried
- bedtime basics are spread across several bags
- the child’s usual sleep support is missing
- the family packed for the destination but not for arrival night
A simple sleep-mistake view:
| Sleep mistake | What it causes |
| no comfort item or familiar sleep support | harder settling and rougher transitions |
| bedtime items packed too deep | stressful arrival and late-night bag searching |
| no plan for a bright or noisy room | harder naps and early wake-ups |
| no first-night sleep bag | bedtime depends on unpacking the whole trip first |
This is one of the categories where a few well-placed items matter much more than extra bulk.
Packing for ideal conditions instead of actual disruptions makes the whole system fragile
This is the mistake behind a lot of the others. Parents pack for the smooth trip: the flight leaves on time, the child naps on schedule, the restaurant works out, nobody spills, the weather stays perfect, the hotel room is ready, and the child is cheerful through all of it. Then the real trip shows up.
Good family packing is not about expecting disaster. It is about expecting normal disruptions:
- a missed nap
- a delayed meal
- a spilled drink
- a wet playground
- a later arrival than planned
- a child who is more tired than usual
A more useful way to pack is to ask:
- what if the first meal runs late
- what if we need one more outfit than planned
- what if bedtime starts with everyone tired
- what if the child needs one more comfort item than expected
A practical disruption check:
| If this is the plan | Pack for this instead too |
| on-time travel day | one delay |
| normal meal timing | one missed or late meal |
| easy bedtime | one overtired bedtime |
| clean weather | one damp, muddy, or messy stretch |
That kind of margin is what keeps the list usable in real life.
Bringing too much gear usually costs more than it saves
Too much gear slows everything down. It makes check-in harder, car loading messier, hotel arrivals more frustrating, and family movement more tiring. It also creates a quieter problem: the more gear you bring, the harder it gets to tell which item is actually helping and which one is just taking up space.
A lot of families do not need less support. They need fewer bulky solutions and a better system.
A useful gear check:
| Gear question | Better answer |
| Does this solve a problem we are very likely to have? | bring it |
| Does this only help in one narrow situation and create hassle everywhere else? | probably leave it |
| Can another item already packed solve most of the same problem? | probably leave it |
| Will this item still feel worth carrying on the hardest part of the travel day? | if not, rethink it |
This is especially true with large kid gear, but it also applies to feeding extras, toys, and backup items that multiply without doing much work. The goal is not an empty bag. The goal is a bag that still works when the family is tired.
The easiest family vacation packing checklist
This is the part of the article where the packing system turns into something you can actually use. By now, the bigger logic should be clear: pack by function, not by room; separate the travel-day layer from the destination layer; keep the high-value items easy to reach; and adjust the list based on the child’s age and the kind of trip. This checklist pulls that all together.
I do not use a master checklist as the first step. I use it as the final step. That matters because a checklist only works if the categories behind it already make sense. Otherwise it becomes one more long list that looks useful and still leaves parents overpacked, underpacked, or digging for the wrong thing at the wrong time.
A strong family vacation packing list with kids should cover the categories that keep showing up across different trips:
- clothing
- diapering and hygiene
- feeding
- sleep
- medicine
- travel documents
- entertainment
- transport gear
- outdoor extras if the trip needs them
A quick master view:
| Category | Main job on the trip |
| Clothing | keeps kids comfortable through weather, mess, and routine |
| Diapering and hygiene | covers daily care, accidents, and cleanup |
| Feeding | supports meals, snacks, drinks, and travel-day delays |
| Sleep | helps with naps, bedtime, and rough arrival nights |
| Medicine | covers daily needs and small health problems fast |
| Travel documents | keeps check-in and travel-day paperwork simple |
| Entertainment | supports waiting, transit, and boredom |
| Transport gear | helps the family move through the trip more easily |
Clothing checklist
Clothing always looks bigger on paper than it needs to be in the bag. What matters most is not building lots of outfits. It is making sure the child has enough everyday clothes, enough spares to recover from normal messes, and enough layers to handle weather and temperature changes without forcing a full outfit change every few hours.
A simple clothing checklist usually includes:
| Clothing item | Why it belongs on the master list |
| Everyday outfits | covers the planned days of the trip |
| Spare outfits | handles spills, leaks, muddy play, and accidents |
| Pajamas | supports bedtime and naps |
| Socks | often need more frequent changes than the rest of the outfit |
| Shoes | should match the actual trip, not just the look of it |
| Layers | help with airports, cars, weather swings, and cold rooms |
| Weather-specific items | solve sun, rain, wind, or colder conditions if relevant |
The reason clothing stays high on the checklist is simple: kids go through clothes for reasons adults usually do not. Food, diapers, puddles, playground dirt, nap sweat, and unpredictable weather all make the clothing margin matter more.
Diapering and hygiene checklist
This is one of the highest-value parts of the whole list because these items do work all day long. A family may get away with fewer toys or fewer extra clothes, but diapering and hygiene problems tend to hit fast and become much more annoying if the basics are missing.
A practical diapering-and-hygiene checklist includes:
| Item | Why it belongs here |
| Diapers or pull-ups | covers the child’s current stage and travel-day timing |
| Wipes | diapering, cleanup, hands, meals, and surfaces |
| Changing mat | makes awkward spaces easier to use |
| Diaper cream | helps with skin issues on long travel days |
| Potty-training support if needed | covers accidents, delays, and public-bathroom transitions |
| Dirty-item or disposal bags | separates mess from the rest of the bag |
| Basic wash-up items | supports bedtime, morning routine, and quick resets |
The easiest mistake here is assuming the suitcase supply is enough. The checklist only really works if the immediate-use portion of these items is also packed where the family can reach it.
Feeding checklist
Feeding is one of the categories that changes most by age, but it still belongs on the master checklist because every family trip has to solve the same basic problems: hunger, timing, cleanup, and backup food when the day runs late. Babies may need bottles or feeding support. Toddlers may need snack structure and meal backups. Preschoolers usually need fewer care items but still need reliable food and drink support.
A strong feeding checklist usually includes:
| Feeding item | Why it matters |
| Bottles or feeding setup if still used | supports baby travel and longer transit windows |
| Cups | keeps drinks manageable during the day |
| Bibs if still useful | lowers clothing changes on messy days |
| Utensils if the child uses them better than standard ones | makes meals easier away from home |
| Snack containers | helps with pacing and portioning |
| Meal backup items | covers delays, late arrivals, and picky moments |
| Cleanup cloth or feeding wipes | keeps the feeding system usable over the full trip |
This is also one of the categories where the packing system matters most. The same items may appear on the full checklist and still need to be split between suitcase, carry-on, and personal-item use depending on the trip.
Sleep checklist
Sleep support is what keeps the whole trip from getting harder at night. A good sleep checklist does not need to be huge, but it does need to be deliberate. It should cover the pieces that help the child settle in a new room, on a rough travel day, or after a nap that did not really happen.
A practical sleep checklist usually includes:
| Sleep item | Why it matters |
| Pajamas or sleep clothing | supports bedtime and naps |
| Main comfort item | helps with settling and familiar routine |
| Sleep sack, blanket, or usual sleep support if relevant | keeps sleep feeling more normal |
| White noise or sound support | helps in shared rooms and noisy places |
| Blackout help if the family uses it | supports naps and early mornings |
| First-night bedtime basics | makes arrival-night sleep easier to set up |
This is one of the categories where forgetting one small item can change the whole evening. That is why it belongs on the master checklist even if the actual number of items is small.
Medicine checklist
Medicine belongs on the master checklist because it is one of the easiest categories to assume you will remember and one of the worst to miss. It does not usually take much space, but the right few items can save a lot of stress if a child gets sick, spikes a fever, gets congested, or needs something regular while you are away.
A practical medicine checklist usually includes:
| Medicine item | Why it belongs on the master list |
| Daily medication | cannot be skipped or left to chance |
| Fever or pain relief basics | covers one of the most common travel-night problems |
| Thermometer | lowers guesswork when a child feels off |
| Small first-aid basics | helps with cuts, scrapes, and little injuries |
| Nasal support if your child already uses it | useful for travel days, dry rooms, and congestion |
| Sunscreen or bug protection if the trip calls for it | belongs here when the setting makes it relevant |
| Insurance and emergency details | helps if care is needed away from home |
The useful part of this checklist is not just what is packed. It is where it is packed. Anything that could matter before bedtime on the travel day should stay with the family, not deep in the main luggage.
Travel documents checklist
This category may be small, but it carries a lot of weight. A passport, birth certificate, booking confirmation, or consent letter does not take much room, but the wrong document setup can slow down the whole trip before it even starts.
A strong document checklist usually includes:
| Document item | Why it matters |
| Adult ID | required for the adult traveler |
| Child passport if needed | required for international travel |
| Proof-of-age document if relevant | useful for lap infants and some check-in questions |
| Booking confirmations | helps with check-in and travel-day details |
| Consent paperwork if relevant | supports one-parent or guardian travel |
| Digital backups | helps if the main papers are misplaced |
This part of the checklist tends to work best when the documents are treated as their own category, not tucked between clothing and snacks.
Entertainment checklist
Entertainment belongs on the master checklist because boredom is one of the easiest travel-day problems to underestimate. This category does not need to be huge. It just needs enough structure to support waiting, transit, and the rough middle stretches when the child is tired but not ready to rest.
A practical entertainment checklist usually includes:
| Activity item | Why it matters |
| One familiar toy or book | easy first layer for waiting |
| One quiet hands-on item | works in cars, seats, and restaurants |
| One paper-based activity if age fits | helps older toddlers and preschoolers stay engaged |
| One stronger backup activity | useful later in the day |
| Screen setup if your family uses one | best kept ready, but not used too early |
The main goal here is not to carry a lot. It is to have enough variety that the child does not burn through the whole plan too early.
Transport gear checklist
Transport gear belongs on the master list because it changes how the whole trip feels. The right stroller, carrier, or car-seat plan can make a long day much easier. The wrong gear can turn movement into one more source of stress.
A useful transport checklist includes:
| Gear item | Why it matters |
| Stroller if the trip supports it | helps with distance, rest, and carrying part of the load |
| Carrier if the trip needs hands-free movement | useful in tighter, rougher, or more crowded settings |
| Car seat if the trip depends on it | supports safe local travel and some flight setups |
| Big-gear plan | helps the family know what is being brought, checked, or left behind |
The checklist part matters because gear decisions are easiest to leave vague until the last minute, and that is usually when the trip starts feeling heavier than it needs to.
Outdoor extras if needed
Not every family trip needs this category, but when it does, it matters. Outdoor extras are the things that support long stretches outside, rougher ground, weather shifts, wet clothes, and the extra cleanup that comes with active outdoor time.
A practical outdoor-extra checklist usually includes:
| Outdoor extra | Why it matters |
| Hat or sun layer | helps with longer outdoor stretches |
| Extra socks | one of the most useful small outdoor backups |
| Weather layer | covers wind, damp conditions, or cooler evenings |
| Outdoor cleanup bag | keeps mud, wet clothes, and dirty gear contained |
| More durable snack setup | supports longer outdoor outings |
This is the part of the master checklist that should stay flexible. If the trip is mostly indoors or city-based, you may not need much here.
If the trip includes trails, campgrounds, or long outdoor days, this section starts doing a lot more work.
Your final pack-the-night-before checklist
The night-before check is where the packing system proves whether it really works. By this point, the family should not still be deciding what to bring. The decisions should already be made. What matters now is making sure the right items are in the right bags, the highest-value things are easy to reach, and the first part of the trip is set up so the day does not begin with a scramble.
I think of this checklist as the handoff between planning and travel. If it is done well, the morning feels more manageable. If it is skipped, the same family can have all the right supplies and still start the day feeling behind.
A useful final-night check looks like this:
| Final-night category | What you want to confirm |
| Documents | ready, complete, and easy to grab |
| Carry-on or day bag | packed for the full travel window |
| Personal item or diaper bag | packed for the next two hours |
| Medicine | packed and reachable |
| Comfort and routine items | already assigned to the right bag |
| Transport gear | loaded, tagged, or ready to go |
Travel documents should be packed first, not checked last
The document step belongs at the beginning of the final-night checklist because it affects everything else. If the adult ID, child passport, proof-of-age paperwork, or booking details are still floating around the house, the rest of the bags do not matter much.
A simple document check usually means:
- adult ID is in the wallet or document pouch
- child travel documents are in the travel folder
- booking details are easy to pull up
- any support paperwork for the trip is already packed
A practical document check:
| Document | What to confirm the night before |
| Adult ID | packed in the place it always lives |
| Child passport or age-proof document | in the travel folder, not on a desk or counter |
| Booking details | printed or saved where they are easy to find |
| Support paperwork if needed | already in the same document setup |
This is one of those categories where a two-minute check can prevent the most stressful kind of morning mistake.
For a more comprehensive guide on what documents do you need to carry for your child while travelling, visit our Child Travel Documents Guide blog.
Carry-on should be packed for the full travel day, not just the transit itself
By the night before, the carry-on should already be doing its real job. It should cover the drive or trip to the airport, the waiting time, the transit itself, delays, messes, snacks, medicine, and the first stretch after arrival. If it is packed only for the plane, only for the car, or only for the destination, it is not really done yet.
That means I would want the carry-on to already have:
- spare clothes
- diapers or pull-ups if relevant
- snacks and drink support
- medicine
- cleanup supplies
- one activity layer
- anything else needed before the family fully settles in
A simple carry-on check:
| If the day does this | The carry-on should already cover it |
| runs longer than planned | yes |
| includes one clothing mess | yes |
| includes one delayed meal | yes |
| includes one missed nap or rough stretch | yes |
If the answer is no to any of those, the bag usually needs one more pass before bedtime.
Diaper bag or personal item should be stocked for the first two hours
This bag should already be set up to solve the next small problems without opening the larger bag. That usually means it is lighter than the carry-on, but more important in the first stretch of the trip.
By the night before, I want this bag to already hold:
- the next diaper or pull-up setup
- wipes
- one snack round
- one backup outfit
- one comfort item
- one small cleanup layer
A useful personal-item check:
| Personal-item item | Why it should already be packed |
| next diaper setup | avoids digging through larger bags early |
| wipes | needed constantly on travel days |
| one snack round | keeps the first stretch calmer |
| emergency outfit | solves the first messy problem fast |
| comfort item | helps with transitions right away |
This is the bag I do not want to build in the morning. It should already be ready to leave.
Medicine should be easy to reach, not just technically packed
A lot of families remember medicine and still pack it badly. It ends up in the wrong bag, mixed into toiletries, or packed in a way that makes it hard to find fast. The night-before check is where I make sure the useful health items are where they would actually help.
That usually means confirming:
- daily medicine is in the travel health pouch
- any travel-day basics are in the bag that stays with the family
- dosing tools or small support items are packed with the medicine, not somewhere else
- nothing important is still in the bathroom cabinet
A final medicine check:
| Medicine item | Better place the night before |
| daily medication | carry-on or day bag |
| fever or pain basics | travel health pouch |
| dosing tool | packed with the medicine itself |
| thermometer if bringing it | same health setup, easy to find |
Chargers should be packed before the bags are zipped
Chargers are one of those things families remember at the very end, which is exactly how they end up left in the wall, on the nightstand, or still plugged in near the couch. On a trip with kids, a dead phone is more than annoying. It can affect directions, booking access, contact information, entertainment backups, and all the little travel-day fixes parents tend to rely on.
That is why I treat chargers like travel-day tools, not random tech items. They should be packed the night before in the bag where they will actually be useful.
A simple charger check:
| Charger item | Where it should go |
| phone charger | carry-on or parent day bag |
| charging block or adapter if needed | same place as the main charger |
| child device charger if relevant | carry-on, not buried in the suitcase |
The useful question is not “Did we bring the charger?” It is “Can I reach it without unpacking half the trip?”
Comfort items should be packed on purpose, not at the last second
Comfort items are easy to forget because they are often still in use at bedtime the night before the trip. That is exactly why they need a clear plan. If the child sleeps with it, rests with it, or calms down faster with it, I want to know before bed which bag it is going into in the morning.
This is one of the few categories I do not like to leave vague. A comfort item is either packed on purpose or it gets forgotten in the rush.
A final comfort-item check:
| Comfort item | What to confirm |
| main comfort item | assigned to the right bag for travel day |
| backup if you truly need one | packed separately, not mixed in with random extras |
| bedtime-related comfort item | easy to move from night use to departure bag |
The goal is simple: the child’s most useful familiar item should not be the thing you realize is still on the bed after you have already loaded the car.
First outfit and first snack should already be decided
This is one of the easiest ways to make the morning smoother. If the family still has to decide what the child is wearing and what the first snack is while everyone is trying to leave, the day starts with unnecessary friction. The best version of this step is very plain: tomorrow’s first outfit is set aside, and the first snack is packed or ready to go.
That matters because the first outfit and first snack often set the tone for the whole first stretch of travel. You want the clothes to be easy, comfortable, and right for the trip start. You want the snack to be useful, not the most exciting thing in the whole food plan.
A simple first-start check:
| First-day item | What to confirm |
| first outfit | laid out, complete, and easy to put on |
| first snack | packed and ready, not still in the pantry |
| first cup or bottle if needed | clean and ready for use |
| first shoes or outer layer | set with the outfit, not scattered |
This is a small step, but it removes a surprising amount of morning clutter.
Transport gear should be loaded or ready to load fast
The last night is also when I want the gear plan settled. Not half-settled. Not “we will figure out the stroller in the morning.” If the trip needs the stroller, carrier, car seat, or any larger item, I want that gear either loaded already or standing by the door in the exact order it needs to go.
This helps because transport gear is usually the part of the departure that feels the heaviest. It is also the part most likely to slow everyone down if one piece is still folded in the wrong room or mixed in with things that are not actually going.
A final gear check:
| Gear item | Night-before goal |
| stroller | folded, tagged if needed, or ready by the door |
| carrier | packed in the bag or set aside clearly |
| car seat | installed or staged for loading |
| overnight or quick-access bag | placed where it will not get buried |
The best version of the final checklist is not fancy. It just means the morning starts with fewer decisions, fewer searches, and fewer things that can still go wrong before you even leave home.
FAQ
What should I pack when traveling with a baby?
Start with the categories that do the most work: feeding, diapering, sleep, clothing backups, cleanup, and medicine. Then separate what you need for the travel day from what you only need after arrival.
What should I pack in my toddler’s carry-on?
Pack the things that solve the next few hours: snacks, wipes, a cup, one backup outfit, one comfort item, one or two simple activities, and any medicine that might matter before arrival.
How many clothes should I pack for a toddler on vacation?
Pack one main outfit per day, then add margin based on how messy your child usually is, how hard the travel day will be, and whether you can do laundry during the trip.
What are the most forgotten baby travel items?
The most forgotten items are usually not the biggest ones. They are the useful small ones: wipes, dosing tools for medicine, backup socks, a comfort item, the next snack, or the first-night sleep items packed in the wrong bag.
Is it better to overpack or underpack for family travel?
Neither usually feels good. The better goal is to pack with margin, not bulk. Bring enough to handle the likely problems, but not so much that the bags become harder to use than the trip itself.
What should stay in the diaper bag during travel?
Keep the next diaper or pull-up setup, wipes, one snack round, one emergency outfit, one comfort item, and a small cleanup layer. The diaper bag should solve the next problem quickly without opening the larger bag.
What do I need for a road trip with a toddler?
A road trip works best with a car setup, not just a packing list. That usually means a snack box, seat-friendly activities, wipes, a quick-stop cleanup kit, one spare outfit, and an overnight bag that keeps the first stop simple.
What is the easiest way to pack for travel with kids?
Pack by function, not by room. Build small working groups for sleep, feeding, health, cleanup, and clothing, then decide what belongs in the suitcase, the carry-on, and the immediate-access bag.
Conclusion
Packing for young kids gets easier once the list stops being random. The goal is not to bring everything that might possibly help. It is to bring the things that solve the problems families actually run into: hunger, messes, missed naps, weather changes, rough transitions, and the first tired hour after arrival.
That is why the best packing system usually comes down to a few simple rules:
- pack by category
- separate travel-day items from destination items
- keep the highest-value things within reach
- pack for your real child, not a generic age group
- leave room for one or two normal disruptions instead of trying to pack for every disaster
A good family packing list should make the trip feel lighter, not heavier. If the bags are easier to use, the day usually feels easier too.